DSLRs (Digital Single-Lens Reflex Cameras)

Understanding the DSLR Advantage

At the heart of a DSLR’s functionality is its mirror mechanism, which reflects light from the lens into an optical viewfinder. This means that what you see through the viewfinder is exactly what your lens captures, providing a true-to-life perspective crucial for precise composition.

Key Features That Enhance Learning

  1. Interchangeable Lenses One of the standout advantages of DSLRs is their ability to switch between a variety of lenses. Whether you’re capturing sweeping landscapes with a wide-angle lens, zooming in on distant subjects with a telephoto lens, or experimenting with macro photography, the flexibility is unmatched. This feature allows beginners to experiment and develop an understanding of focal lengths and composition techniques. Major brands like Canon, Nikon, and Sony offer extensive lens ecosystems, ensuring photographers have the right tools for every situation. Canon’s EF and RF lenses, Nikon’s F-mount and Z-mount lenses, and Sony’s A-mount lenses all provide a range of options for different types of photography.
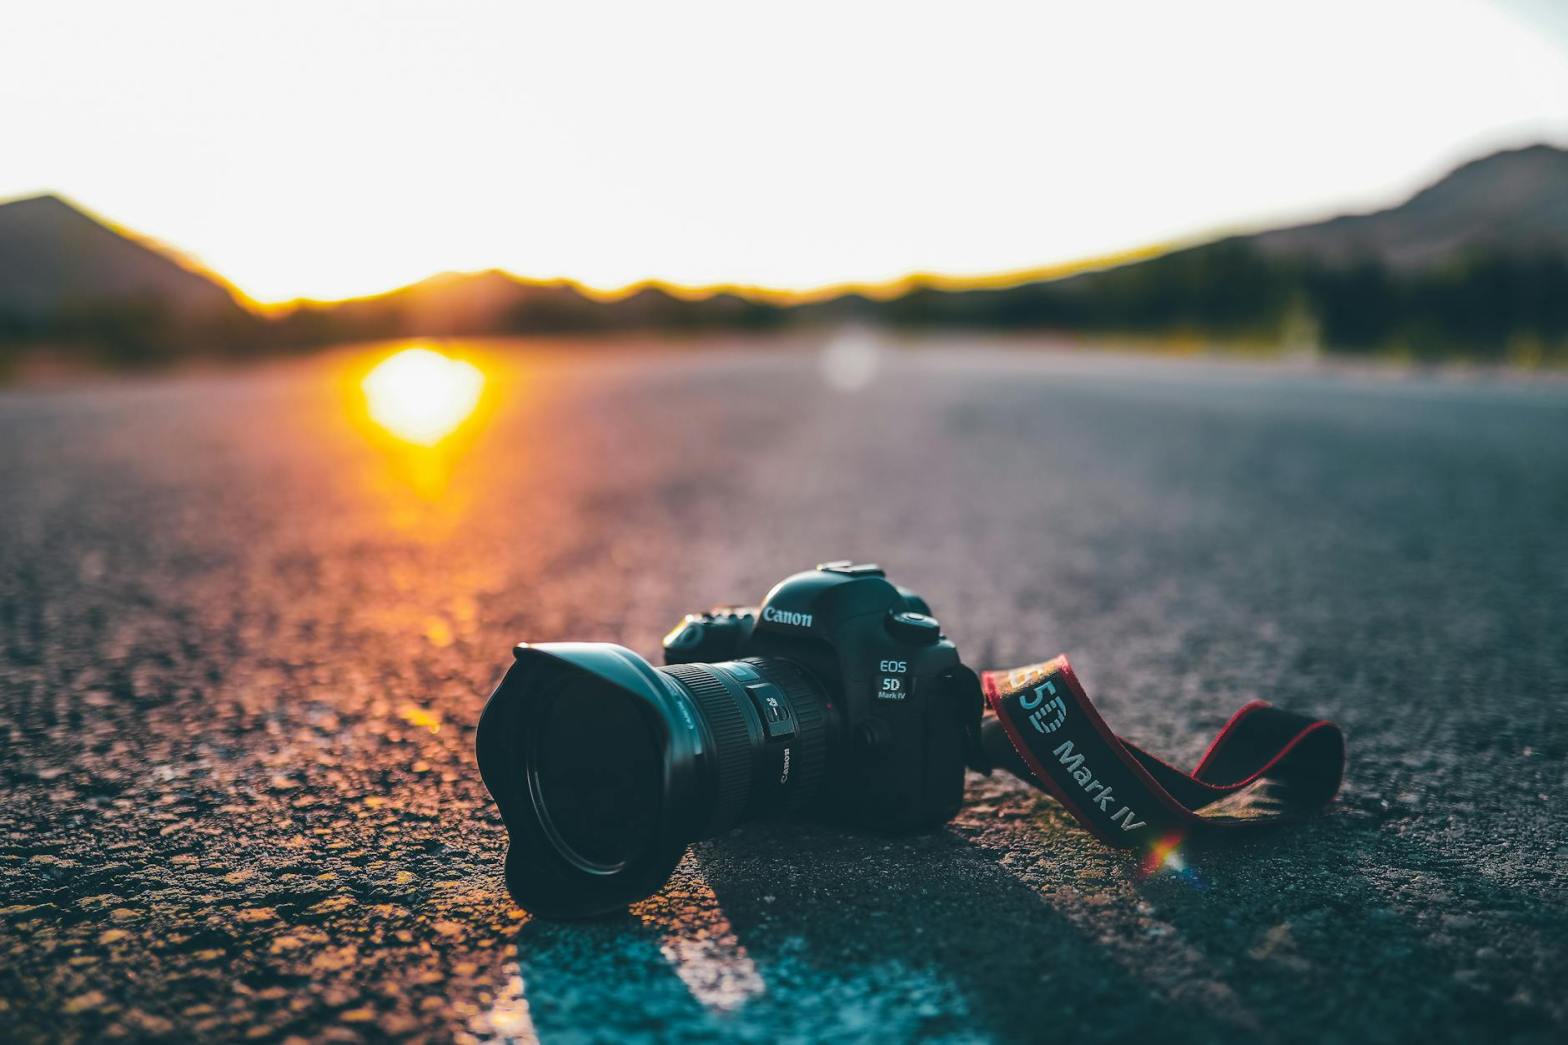
  2. Superior Image Quality DSLRs are equipped with large sensors, typically APS-C or full-frame, which means they can capture high-resolution images with excellent detail, dynamic range, and low-light performance. The ability to shoot in RAW format allows for extensive post-processing, giving photographers full control over color grading and exposure adjustments. Some notable DSLR models include the Canon EOS 5D Mark IV, Nikon D850, and Pentax K-1 II, all of which are praised for their outstanding image quality and professional features.
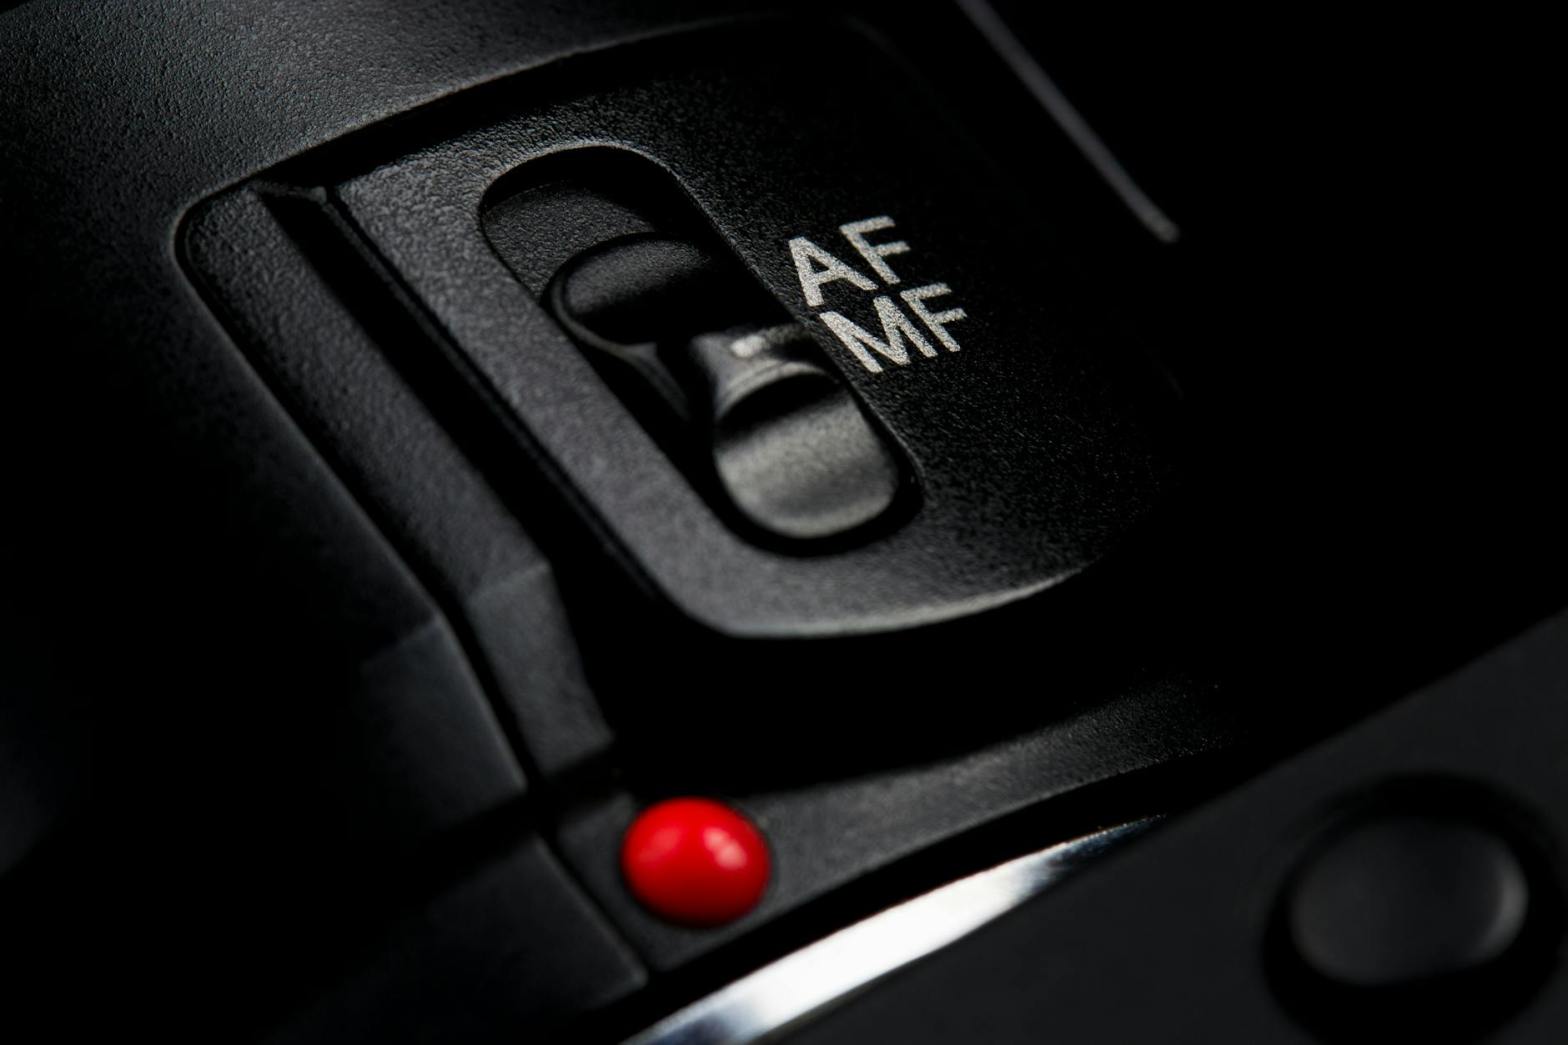
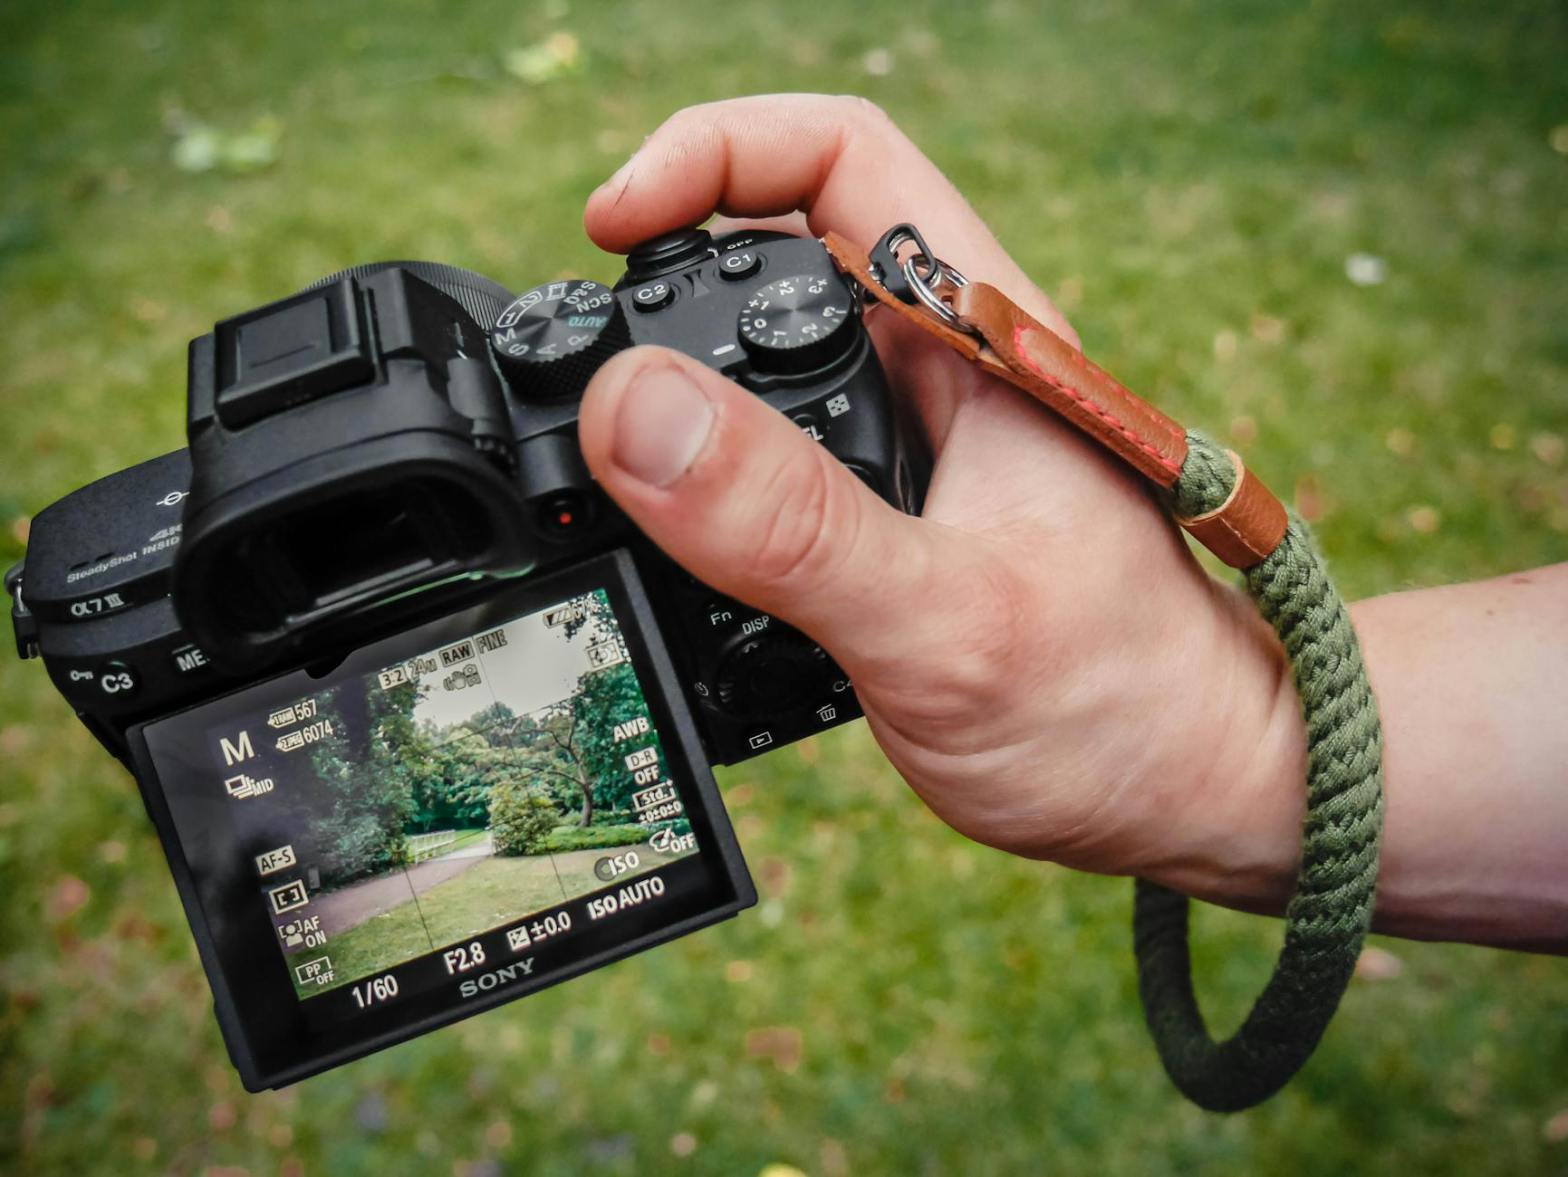
  3. Manual Control for Skill Development Unlike point-and-shoot cameras or smartphones, DSLRs offer complete control over settings such as aperture, shutter speed, and ISO. Mastering these settings helps photographers understand exposure, motion blur, and depth of field—key fundamentals in digital photography. Beginners can start with semi-automatic modes like Aperture Priority (Av/A) and Shutter Priority (Tv/S) before transitioning to full manual mode. This gradual progression helps users gain confidence and refine their creative control over their images.
  4. Optical Viewfinder for Real-Time Composition The optical viewfinder (OVF) in DSLRs provides a real-time, lag-free view of the scene, unlike mirrorless cameras that rely on electronic viewfinders (EVFs). This makes DSLRs particularly advantageous in bright outdoor conditions where electronic screens might suffer from glare.
  5. Durability and Longevity Many DSLRs are built to withstand challenging environments. Weather-sealed bodies and rugged designs make them suitable for outdoor adventures, allowing learners to practice in diverse conditions without worrying about damage from dust or moisture. Brands like Canon and Nikon are known for their durable DSLR models, with cameras like the Nikon D6 and Canon EOS-1D X Mark III built to handle extreme professional use.

Pros and Cons of DSLRs

ProsCons
Superior image quality due to large sensorsBulky and heavier compared to mirrorless cameras
Interchangeable lenses offer versatilitySteeper learning curve for beginners
Manual control for better creative controlTypically more expensive than compact cameras
Optical viewfinder provides real-time previewAutofocus in live view mode is slower than mirrorless
Long battery life compared to mirrorless camerasLimited video capabilities in some models
Durable and weather-sealed models availableCan be intimidating due to numerous buttons and settings

Overcoming the Learning Curve

Despite their advantages, DSLRs come with certain challenges, particularly for beginners. Here’s how to navigate them:

  • Managing Size and Weight: Unlike compact mirrorless cameras or smartphones, DSLRs tend to be bulkier. Investing in a comfortable camera strap and a quality bag can make carrying them easier. Some photographers opt for crop-sensor (APS-C) DSLRs like the Canon EOS 90D or Nikon D7500 for a balance of portability and performance.
  • Understanding Controls and Features: The vast number of settings and buttons may seem daunting at first. A good approach is to start with semi-automatic modes before transitioning to full manual control. Online tutorials, photography books, and camera-specific user guides can also be valuable resources.
  • Post-Processing and Editing: To fully harness a DSLR’s capabilities, learning post-processing software such as Adobe Lightroom or Photoshop is beneficial. RAW files provide flexibility in exposure, color correction, and sharpness adjustments.

Comparing DSLRs to Mirrorless Cameras

In recent years, mirrorless cameras have gained popularity due to their compact design and advanced autofocus systems. However, DSLRs still hold an edge in certain areas:

  • Battery Life: DSLRs generally have longer battery life due to the optical viewfinder using less power compared to mirrorless electronic viewfinders.
  • Lens Compatibility: Many photographers already own a collection of DSLR lenses, and adapting them to mirrorless systems can be cumbersome.
  • Optical Viewfinder Advantage: Some photographers prefer the real-time, lag-free viewing experience of an optical viewfinder.

That said, brands like Sony, Canon, and Nikon have been advancing their mirrorless technology, with models such as the Sony A7 IV, Canon EOS R5, and Nikon Z9 leading the market.

Tips for Choosing Your First DSLR

When selecting a DSLR as a beginner, consider the following:

  1. Budget: Entry-level models like the Canon Rebel T8i or Nikon D5600 offer excellent features at an affordable price.
  2. Sensor Size: APS-C sensors provide a good balance between affordability and performance, while full-frame sensors offer the best image quality but at a higher cost.
  3. Lens Availability: Ensure that the brand you choose has a diverse range of lenses for future growth.
  4. Intended Use: Portrait, landscape, sports, and wildlife photography all have different lens and camera body requirements.

Conclusion

While the learning curve may be steep, mastering a DSLR is a rewarding journey that equips photographers with the tools to capture stunning images. With patience, practice, and an eagerness to explore, beginners can harness the full potential of a DSLR and take their photography skills to new heights.

Whether choosing a Canon, Nikon, Pentax, or Sony DSLR, the key to success lies in continuous learning, hands-on experimentation, and a passion for storytelling through images.

Focus Techniques: Autofocus vs. Manual Focus

Focus is one of the most critical aspects of photography. Without proper focus, even the most beautifully composed and perfectly exposed photographs can fall flat. To achieve sharp, captivating images, it is essential to understand focus techniques, particularly the use of autofocus (AF) and manual focus (MF). Each method has its strengths and weaknesses, and knowing when and how to use them will elevate your photography.


Understanding Focus

Focus refers to the process of adjusting the lens to render the subject sharp and clear in the final image. It determines which part of the image appears sharpest, creating a focal point for the viewer. Modern cameras offer both autofocus and manual focus capabilities, providing photographers with flexibility.

Autofocus relies on the camera’s internal systems to determine and lock focus on a subject. In contrast, manual focus allows the photographer to control the focus by physically adjusting the lens. The choice between these two methods depends on the subject, shooting conditions, and your creative intent.


Autofocus (AF)

Autofocus systems are designed to quickly and accurately focus on a subject, making them indispensable for many types of photography. Autofocus can be broken down into two main types: phase detection and contrast detection.

How Autofocus Works

  1. Phase Detection:
    • Common in DSLRs and advanced mirrorless cameras, phase detection compares two images captured by the camera sensor to calculate focus. It is fast and effective, especially in well-lit conditions.
  2. Contrast Detection:
    • Found in many mirrorless and compact cameras, this method analyzes the image directly on the sensor to find the point of highest contrast, indicating sharp focus. While highly accurate, it can be slower, particularly in low light.

Autofocus Modes

Modern cameras offer a variety of autofocus modes tailored to different scenarios:

  1. Single-Point AF:
    • The camera focuses on a single point chosen by the photographer. Ideal for stationary subjects like portraits or still-life photography.
  2. Zone AF:
    • Focuses on a broader area, useful when photographing moving subjects like wildlife or sports.
  3. Tracking AF (Continuous AF):
    • Continuously adjusts focus to follow a moving subject, perfect for action shots or video recording.
  4. Eye/Face Detection AF:
    • Specifically designed to detect and lock focus on human or animal eyes, ensuring portraits are sharp and engaging.

Advantages of Autofocus

  • Speed and Convenience: Modern autofocus systems are incredibly fast, making them ideal for capturing fleeting moments.
  • Accuracy with Technology: Features like eye detection and subject tracking ensure precision.
  • Ease of Use: Perfect for beginners or situations where manual focus adjustments are impractical.

Challenges of Autofocus

  • Low-Light Performance: Autofocus may struggle in dim lighting or low-contrast scenes.
  • Specific Focal Points: The camera’s autofocus system might not lock onto the exact subject you want.
  • Creative Limitations: In some situations, autofocus may not allow the level of control required for specific artistic effects.

Manual Focus (MF)

Manual focus puts the photographer in full control of the focusing process. While it requires more skill and time, it offers unparalleled precision and creative flexibility.

How Manual Focus Works

Using manual focus involves rotating the focus ring on the lens to adjust the focus distance. Many modern cameras assist with manual focusing through tools like focus peaking and magnified views on the screen or electronic viewfinder.

When to Use Manual Focus

  1. Low-Light Conditions:
    • Autofocus often struggles in dim environments. Manual focus allows you to achieve clarity even in challenging lighting.
  2. Macro Photography:
    • When working with extremely close subjects, manual focus ensures pinpoint accuracy.
  3. Landscape Photography:
    • For vast scenes requiring focus on specific elements or achieving maximum depth of field, manual focus is invaluable.
  4. Creative Effects:
    • Manual focus lets you intentionally blur parts of an image, creating a dreamy, artistic look.

Advantages of Manual Focus

  • Precision: Allows for exact focus on the desired subject, especially in complex scenes.
  • Control: Essential for creative photography requiring unconventional focus points.
  • Reliability: Works consistently in situations where autofocus may fail, such as low contrast or low light.

Challenges of Manual Focus

  • Slower Process: Achieving precise focus takes time, making it less practical for fast-paced scenarios.
  • Steeper Learning Curve: Beginners may find manual focus intimidating and challenging to master.
  • Risk of Error: Without proper techniques, manual focus can lead to missed shots or soft images.

Comparing Autofocus and Manual Focus

Use Cases for Autofocus

  • Sports and Wildlife Photography:
    • Speed and tracking capabilities make autofocus essential for fast-moving subjects.
  • Portrait Photography:
    • Eye and face detection ensure the subject’s eyes are sharp.
  • Event Photography:
    • In dynamic, unpredictable environments, autofocus offers the reliability needed to capture moments as they unfold.

Use Cases for Manual Focus

  • Macro Photography:
    • Fine adjustments enable precise focus on tiny subjects.
  • Astrophotography:
    • Focusing on stars or distant objects requires manual adjustment.
  • Filmmaking:
    • Manual focus allows seamless control over focus pulls and creative storytelling.

Hybrid Approach

Many photographers use both techniques in tandem. For example, starting with autofocus to achieve a rough focus and then switching to manual for fine-tuning.


Tools to Enhance Focus Techniques

Modern cameras and lenses come equipped with features to enhance both autofocus and manual focus:

  1. Focus Peaking:
    • Highlights the areas in focus, aiding manual focusing.
  2. Magnified View:
    • Zooms into the focus area, allowing for precise adjustments.
  3. Customizable Focus Points:
    • Select specific areas for autofocus to prioritize.
  4. Touchscreen Focus:
    • Tap-to-focus functionality simplifies autofocus operation.

Tips for Mastering Focus

  1. Practice Manual Focus:
    • Spend time learning manual focus techniques to understand depth of field and focal planes better.
  2. Use a Tripod:
    • Stabilize your camera for sharper focus, especially when using manual focus.
  3. Understand Focus Modes:
    • Familiarize yourself with your camera’s autofocus modes and when to use them.
  4. Experiment with Depth of Field:
    • Play with aperture settings to achieve creative effects like background blur or full-scene sharpness.
  5. Inspect Your Images:
    • Use your camera’s playback zoom to check focus accuracy after capturing shots.

Conclusion

Both autofocus and manual focus are essential tools in a photographer’s arsenal. By understanding their unique strengths and limitations, you can make informed choices to suit any scenario. Autofocus excels in speed and convenience, while manual focus provides precision and creative control. Mastery of these focus techniques will empower you to capture sharp, compelling images, elevating your photography to new heights. The key lies in knowing your gear, practicing regularly, and experimenting to discover your preferred focus style.

Essential Accessories

Having the right camera is just the beginning of your photographic journey. To make the most of your gear and achieve your creative vision, it’s crucial to invest in the right accessories. These tools enhance your photography experience, provide greater versatility, and help you overcome challenges in different shooting conditions. Here’s a comprehensive look at the essential accessories every photographer should consider.

1. Camera Lenses

The lens you use significantly influences the quality and style of your photographs. Different lenses cater to various types of photography:

Prime Lenses

  • Features: Fixed focal length, usually faster apertures (e.g., f/1.8, f/1.4).
  • Best For: Portraits, low-light photography, and sharp, detailed images.
  • Advantages: Superior image quality, lightweight, and compact.

Zoom Lenses

  • Features: Variable focal lengths (e.g., 24-70mm, 70-200mm).
  • Best For: Versatility and situations where changing lenses isn’t practical.
  • Advantages: Covers multiple focal lengths, making them great for travel and events.

Specialty Lenses

  • Macro Lenses: Ideal for close-up photography of small subjects like insects and flowers.
  • Wide-Angle Lenses: Perfect for landscapes and architectural shots.
  • Telephoto Lenses: Great for sports and wildlife photography, enabling you to capture distant subjects.

2. Tripods

A tripod is an indispensable tool for stable and sharp images, especially in challenging lighting conditions.

Types of Tripods

  • Full-Size Tripods: Offer maximum stability; ideal for landscapes, portraits, and studio work.
  • Travel Tripods: Lightweight and compact, designed for photographers on the go.
  • Mini Tripods: Perfect for tabletop photography and compact setups.

Key Features to Look For

  • Material: Aluminum (affordable and durable) or carbon fiber (lightweight and sturdy).
  • Height: Adjustable to suit your shooting needs.
  • Load Capacity: Ensure it can support your camera and heaviest lens.

3. Camera Bags

A reliable camera bag protects your gear and makes it easy to transport. Choose a bag based on your shooting style and the amount of equipment you carry.

Popular Options

  • Backpacks: Excellent for carrying multiple lenses and accessories over long distances.
  • Shoulder Bags: Ideal for quick access to your camera and lenses.
  • Sling Bags: A hybrid option offering convenience and moderate capacity.
  • Hard Cases: Provide maximum protection for professional gear during travel.

4. Filters

Filters are essential for controlling light, enhancing colors, and protecting your lenses.

Common Filter Types

  • UV Filters: Protect the lens from scratches and dust.
  • Polarizing Filters: Reduce reflections and enhance color saturation in skies and water.
  • Neutral Density (ND) Filters: Reduce light entering the lens, allowing slower shutter speeds for creative effects like smooth water or motion blur.

Choosing Filters

Invest in high-quality filters that match your lens diameter to ensure optimal performance.

5. External Flash and Lighting Equipment

Natural light isn’t always sufficient, and mastering artificial lighting opens up new creative possibilities.

Flash Options

  • On-Camera Flash: Compact and portable, great for event photography.
  • Off-Camera Flash: Offers flexibility in positioning for creative lighting setups.

Other Lighting Accessories

  • Reflectors: Bounce light onto your subject to fill in shadows.
  • Softboxes: Diffuse light for softer, more flattering portraits.
  • Light Stands: Provide stability and positioning for off-camera flashes or continuous lights.

6. Memory Cards

High-quality memory cards are vital for storing your images securely.

What to Look For

  • Capacity: Choose cards with ample storage (e.g., 64GB, 128GB) for long shoots.
  • Speed: High write speeds (e.g., 90MB/s or higher) are essential for burst shooting and 4K video.
  • Reliability: Opt for trusted brands like SanDisk, Lexar, or Samsung.

Backup Solutions

Carry multiple cards and consider portable hard drives or cloud storage for redundancy.

7. Batteries and Chargers

Running out of battery power can cut a shoot short. Always carry extras.

Recommendations

  • Extra Batteries: Ensure compatibility with your camera model.
  • Portable Chargers or Power Banks: Keep your camera and other devices charged on the go.
  • Battery Grips: Attach to your camera for extended shooting time and better ergonomics.

8. Remote Shutter Release

A remote shutter release helps eliminate camera shake, especially for long exposures and self-portraits.

Types

  • Wired Remotes: Simple and affordable, connect directly to your camera.
  • Wireless Remotes: Offer greater flexibility, often with additional features like interval shooting.
  • App-Based Controls: Use your smartphone to control your camera remotely.

9. Cleaning Equipment

Keeping your gear clean ensures optimal performance and longevity.

Essential Tools

  • Lens Cloths and Cleaning Solution: For removing smudges and dust from lenses.
  • Air Blower: Safely remove dust from your sensor and lens without touching them.
  • Sensor Cleaning Kits: For more thorough cleaning when needed.
  • Microfiber Cloths: General cleaning for camera bodies and accessories.

10. Straps and Harnesses

Comfortable straps and harnesses make carrying your camera easier during long shoots.

Options

  • Neck Straps: Standard straps provided with cameras, though aftermarket options offer better comfort.
  • Wrist Straps: Compact and ideal for lighter cameras.
  • Harnesses: Distribute weight evenly for carrying multiple cameras.

11. Software and Apps

Post-processing software and mobile apps are essential for editing and managing your photos.

Popular Choices

  • Adobe Lightroom and Photoshop: Industry-standard tools for comprehensive editing.
  • Capture One: Known for exceptional color grading and tethered shooting.
  • Mobile Apps: Snapseed and VSCO for editing on the go.

Listen to the podcast here –

Conclusion

Investing in essential accessories enhances your ability to capture the images you envision and ensures a smoother, more enjoyable photography experience. From lenses and tripods to lighting and software, each accessory plays a critical role in expanding your creative capabilities. As you grow in your photographic journey, building a versatile toolkit will empower you to tackle any challenge and achieve your artistic goals.

Types of Cameras

Types of Cameras: DSLRs, Mirrorless, Compact, and Smartphone Cameras

Photography begins with understanding your tools. Each type of camera has unique features, strengths, and limitations that cater to different needs, styles, and levels of expertise. Below, we explore the primary types of cameras available today.

DSLRs (Digital Single-Lens Reflex Cameras)

DSLRs are the workhorses of professional and enthusiast photography. They use a mirror mechanism to reflect light from the lens into an optical viewfinder, allowing photographers to see exactly what the lens sees.

Key Features:

  • Interchangeable Lenses: DSLRs offer a wide range of lenses, from wide-angle to telephoto, giving photographers incredible versatility.
  • Superior Image Quality: Equipped with large sensors, DSLRs excel in capturing detailed, high-resolution images, even in low light.
  • Manual Control: These cameras provide extensive control over settings like aperture, shutter speed, and ISO, making them ideal for learning and mastery.
  • Durability: Designed for rigorous use, many DSLRs are weather-sealed and robust.

Considerations:

  • Size and Weight: DSLRs are bulkier and heavier compared to other camera types.
  • Learning Curve: Beginners may need time to get accustomed to the controls and features.

Mirrorless Cameras

Mirrorless cameras have revolutionized the photography world by eliminating the mirror mechanism, offering a more compact alternative to DSLRs. Instead of an optical viewfinder, they use an electronic viewfinder or the LCD screen to display the image.

Key Features:

  • Compact Design: Without the bulky mirror assembly, mirrorless cameras are lighter and more portable.
  • Electronic Viewfinder (EVF): The EVF displays real-time exposure and settings adjustments, giving photographers immediate feedback.
  • Interchangeable Lenses: Like DSLRs, mirrorless cameras support a variety of lenses.
  • Advanced Autofocus Systems: Mirrorless cameras often have superior autofocus tracking, especially for video.

Considerations:

  • Battery Life: The reliance on electronic components can drain the battery faster.
  • Limited Lens Selection: While improving, lens options for some systems may be narrower than those for DSLRs.

Compact Cameras

Also known as point-and-shoot cameras, compact cameras are designed for simplicity and ease of use. They cater to casual photographers who want decent image quality without the complexity of larger systems.

Key Features:

  • Portability: Compact and lightweight, these cameras are perfect for on-the-go photography.
  • Ease of Use: With automatic settings, they are ideal for beginners or those who prefer a hassle-free experience.
  • Integrated Lenses: These cameras typically have fixed lenses with varying zoom ranges.
  • Affordability: Generally more budget-friendly than DSLRs and mirrorless cameras.

Considerations:

  • Limited Manual Control: Compact cameras may not offer much flexibility for advanced settings.
  • Image Quality: Smaller sensors can limit performance in low light and reduce depth of field control.

Smartphone Cameras

Smartphones have become the most widely used cameras in the world due to their convenience and ever-improving capabilities. Modern smartphones often feature multiple lenses and advanced computational photography.

Key Features:

  • Always Accessible: Smartphones are almost always within reach, making them perfect for spontaneous photography.
  • Computational Enhancements: Features like HDR, portrait mode, and night mode enhance image quality.
  • Social Media Integration: Easy sharing directly from the device.
  • Video Capabilities: High-quality video recording with features like stabilization.

Considerations:

  • Sensor Size: While improving, smartphone sensors are still smaller than those of dedicated cameras.
  • Limited Manual Controls: Many smartphones rely on automatic settings, although some offer “pro” modes.
  • Fixed Lenses: Without interchangeable lenses, smartphones rely on digital zoom, which can reduce image quality.

Key Features to Compare

When choosing a camera, it’s important to consider the following features:

  • Sensor Size: Larger sensors generally produce better image quality and handle low light better.
  • Megapixels: While not the sole determinant of quality, more megapixels can allow for larger prints and detailed crops.
  • Lens Compatibility: The availability of lenses can significantly impact your creative possibilities.
  • Portability: Consider how often and where you’ll be using the camera.
  • Price: Balance your budget with the features you prioritize.

Conclusion

Understanding the different types of cameras and their features is the first step in your photographic journey. Each type has its own strengths and is suited for specific needs, whether you’re capturing landscapes on a DSLR, vlogging with a mirrorless camera, documenting travel with a compact camera, or sharing moments instantly from your smartphone. Choose the camera that aligns with your goals and start exploring the endless possibilities of digital photography.