Mastering Post-Processing: A Guide to Editing Software in Digital Photography

Post-processing is the final and often transformative step in the digital photography workflow. It allows photographers to refine their images, correct imperfections, and elevate the aesthetic appeal of their work. Editing software has revolutionized how photographers achieve their creative vision, offering tools to enhance everything from basic adjustments to intricate retouching.

This blog post delves into the world of post-processing, focusing on popular editing software options, their unique features, and how to get started.


Why Post-Processing Matters

Post-processing is more than just fixing mistakes; it’s an extension of your creative expression. While capturing a great image in-camera is essential, editing allows you to:

  1. Correct Exposure and Color: Adjust brightness, contrast, and color balance for a polished look.
  2. Enhance Details: Sharpen images and bring out textures.
  3. Add Artistic Flair: Use filters, overlays, and creative effects to personalize your work.
  4. Prepare for Print or Digital Display: Optimize resolution, cropping, and color profiles for specific formats.

Popular Editing Software Options

The right editing software depends on your skill level, budget, and editing needs. Below, we explore some of the most widely used options, ranging from industry leaders to free alternatives.


1. Adobe Lightroom

Adobe Lightroom is a powerhouse for photographers, offering an intuitive interface for organizing, editing, and sharing photos.

Key Features:

  • Non-Destructive Editing: Changes are stored separately, preserving the original image.
  • Batch Editing: Apply edits to multiple photos simultaneously.
  • Presets: Use pre-designed settings to achieve specific looks with a single click.
  • Cloud Syncing: Edit on-the-go with mobile and desktop integration.

Best For: Photographers who want an efficient workflow for managing and editing large image libraries.

Getting Started:

  • Import your images into Lightroom.
  • Use the Develop module for basic edits like exposure, contrast, and color correction.
  • Explore the Adjustment Brush for targeted edits, like brightening a subject or enhancing skies.

2. Adobe Photoshop

Adobe Photoshop is the gold standard for advanced editing and creative manipulation. While it requires a steeper learning curve, the possibilities are endless.

Key Features:

  • Layer-Based Editing: Organize edits in layers for precise control.
  • Retouching Tools: Remove blemishes, adjust skin tones, and enhance facial features.
  • Composite Editing: Combine multiple images to create surreal effects.
  • Advanced Color Grading: Use curves and selective color adjustments for cinematic looks.

Best For: Photographers who need detailed retouching or want to create complex compositions.

Getting Started:

  • Open your image in Photoshop and duplicate the background layer to preserve the original.
  • Use tools like the Healing Brush for minor fixes and Adjustment Layers for global edits.
  • Experiment with masks to apply changes selectively.

3. Capture One

Capture One is a professional-grade editor favored by studio photographers for its excellent RAW processing and tethered shooting capabilities.

Key Features:

  • Superior Color Editing: Fine-tune colors with precision.
  • RAW Processing: Exceptional handling of RAW files with minimal loss of quality.
  • Customizable Interface: Tailor the layout to suit your workflow.
  • Tethering: Connect your camera for real-time previews during a shoot.

Best For: Photographers who prioritize color accuracy and work in controlled environments like studios.

Getting Started:

  • Import RAW files into Capture One.
  • Use the Color Editor for targeted adjustments.
  • Leverage Styles (similar to Lightroom presets) for quick edits.

4. Affinity Photo

Affinity Photo is a budget-friendly alternative to Photoshop, offering many of the same advanced editing capabilities without a subscription model.

Key Features:

  • Layer Support: Includes adjustment layers, masks, and blending modes.
  • Retouching Tools: Comprehensive set for skin smoothing and object removal.
  • HDR and Panorama Merging: Create dynamic range-rich images or sweeping vistas.

Best For: Hobbyists and professionals seeking advanced tools without ongoing costs.

Getting Started:

  • Familiarize yourself with the toolbar and layers panel.
  • Use the Inpainting Brush for object removal and the Liquify Persona for reshaping.
  • Explore live filters for real-time previews of adjustments.

5. Skylum Luminar Neo

Luminar Neo is known for its AI-powered tools, making it easy to achieve stunning results with minimal effort.

Key Features:

  • AI Enhancements: Tools like Sky Replacement and Accent AI simplify complex edits.
  • One-Click Templates: Start with pre-designed looks tailored to specific scenes.
  • Layer Support: Combine multiple images or effects.

Best For: Beginners and photographers who want quick, impactful edits without diving deep into technical settings.

Getting Started:

  • Import your photo and apply a template.
  • Use AI tools like Enhance and Structure for global improvements.
  • Adjust layers to blend effects and fine-tune the final look.

6. Free Alternatives

If you’re on a budget, there are excellent free options that provide robust editing capabilities:

  • GIMP: Open-source software similar to Photoshop, with layer support and advanced tools.
  • Darktable: A Lightroom alternative for RAW editing and photo management.
  • Snapseed: A mobile app by Google offering powerful tools like selective edits and healing.

Essential Post-Processing Steps

While the tools vary, the basic workflow for post-processing remains consistent across most software:

  1. Import Your Photos: Organize your images into folders or libraries for easy access.
  2. Start with Global Edits: Adjust exposure, contrast, white balance, and saturation to establish a solid foundation.
  3. Make Targeted Adjustments: Use brushes, masks, or layers to fine-tune specific areas, like brightening a face or enhancing the sky.
  4. Retouch as Needed: Remove distractions, smooth skin, or sharpen details.
  5. Export for Use: Save your final images in formats optimized for print or online sharing.

Tips for Effective Post-Processing

  1. Shoot in RAW: RAW files retain more information than JPEGs, giving you greater flexibility in editing.
  2. Calibrate Your Monitor: Accurate colors and brightness ensure consistency across devices.
  3. Use Presets and Styles: Save time by starting with a look that matches your vision.
  4. Don’t Overdo It: Subtlety often produces the most natural and appealing results.
  5. Backup Your Work: Store your edited files and originals in multiple locations to avoid loss.

Conclusion

Post-processing is an integral part of digital photography that bridges the gap between capturing an image and bringing your artistic vision to life. With a wide range of editing software available, there’s a tool for every skill level and style. By mastering post-processing techniques, you can transform good photos into great ones, ensuring your work stands out in a crowded digital landscape.

Explore these tools, experiment with their features, and let your creativity shine. Happy editing!

Low-Light Photography: Overcoming Challenges in Dim Environments

Low-light photography is a rewarding but challenging aspect of photography that tests a photographer’s technical skills and creative vision. Whether you’re capturing a cityscape at night, a candlelit dinner, or the stars above, mastering low-light techniques can unlock the beauty hidden in the shadows. This guide provides a comprehensive look at tools, techniques, and tips to excel in low-light conditions.


Understanding the Challenges of Low Light

Photographing in low-light scenarios presents unique challenges:

  1. Insufficient Light: Leads to underexposed images.
  2. Noise: Low light often forces higher ISO settings, increasing image grain.
  3. Camera Shake: Slower shutter speeds may introduce blur due to hand movement.
  4. Focus Issues: Autofocus systems may struggle in dim environments.

Despite these obstacles, proper techniques and equipment can help you create stunning low-light images.


Essential Camera Settings for Low-Light Photography

Understanding and adjusting your camera settings is the foundation of successful low-light photography.

1. Aperture: Letting in More Light

The aperture controls how much light enters the camera. For low-light situations:

  • Use a wide aperture (e.g., f/1.4 to f/2.8) to maximize light intake.
  • Prime lenses, which often feature wide apertures, are excellent for low-light shooting.

Pro Tip:

Be mindful of shallow depth of field when using wide apertures, as this can blur parts of the subject unintentionally.


2. ISO: Amplifying Light

ISO determines your camera sensor’s sensitivity to light.

  • Increase ISO to brighten the image in low light.
  • Modern cameras can handle high ISO settings (e.g., ISO 3200 or higher) with minimal noise, but experiment to find your camera’s limits.

Noise Management:

Use noise-reduction software like Adobe Lightroom to clean up images without sacrificing detail.


3. Shutter Speed: Finding Balance

A slower shutter speed allows more light to reach the sensor. However, this comes with the risk of motion blur.

  • Use a tripod to stabilize the camera for slower shutter speeds (e.g., 1 second or longer).
  • For handheld shots, try to keep shutter speed above the reciprocal of your focal length (e.g., 1/50 for a 50mm lens).

Creative Use:

Intentional motion blur, such as light trails, can add artistic flair to your shots.


4. Manual Focus for Precision

In low light, autofocus may struggle. Switching to manual focus gives you control.

Tips for Manual Focus:

  • Use live view or focus magnification features to ensure sharp focus.
  • Focus on high-contrast areas or light sources in the frame.

Equipment for Low-Light Photography

Having the right tools can make a significant difference in your low-light photography.

1. Tripods: Your Best Friend in Low Light

A tripod stabilizes your camera, allowing for longer exposures without introducing camera shake.

Features to Look For:

  • Lightweight and portable designs for travel.
  • Ball-head mounts for flexible adjustments.

2. Lenses: Bright and Versatile

Invest in fast lenses with wide maximum apertures (e.g., f/1.8 or f/1.4).

  • Prime Lenses: Often sharper and better for low light than zoom lenses.
  • Wide-Angle Lenses: Ideal for capturing more of the scene in dim environments like cityscapes or astrophotography.

3. External Lighting

Supplement natural light with artificial sources.

  • Speedlights: Portable flashes for controlled lighting.
  • LED Panels: Provide continuous light and are ideal for video and photography.

4. Remote Shutter Release

A remote shutter release minimizes vibrations during long exposures. Some cameras also offer mobile apps to control the shutter wirelessly.


Techniques for Stunning Low-Light Photos

Beyond settings and gear, mastering techniques is crucial.

1. Shoot in RAW

RAW files retain more data than JPEGs, allowing greater flexibility in post-processing. Adjust exposure, white balance, and noise reduction without losing quality.


2. Use Available Light Creatively

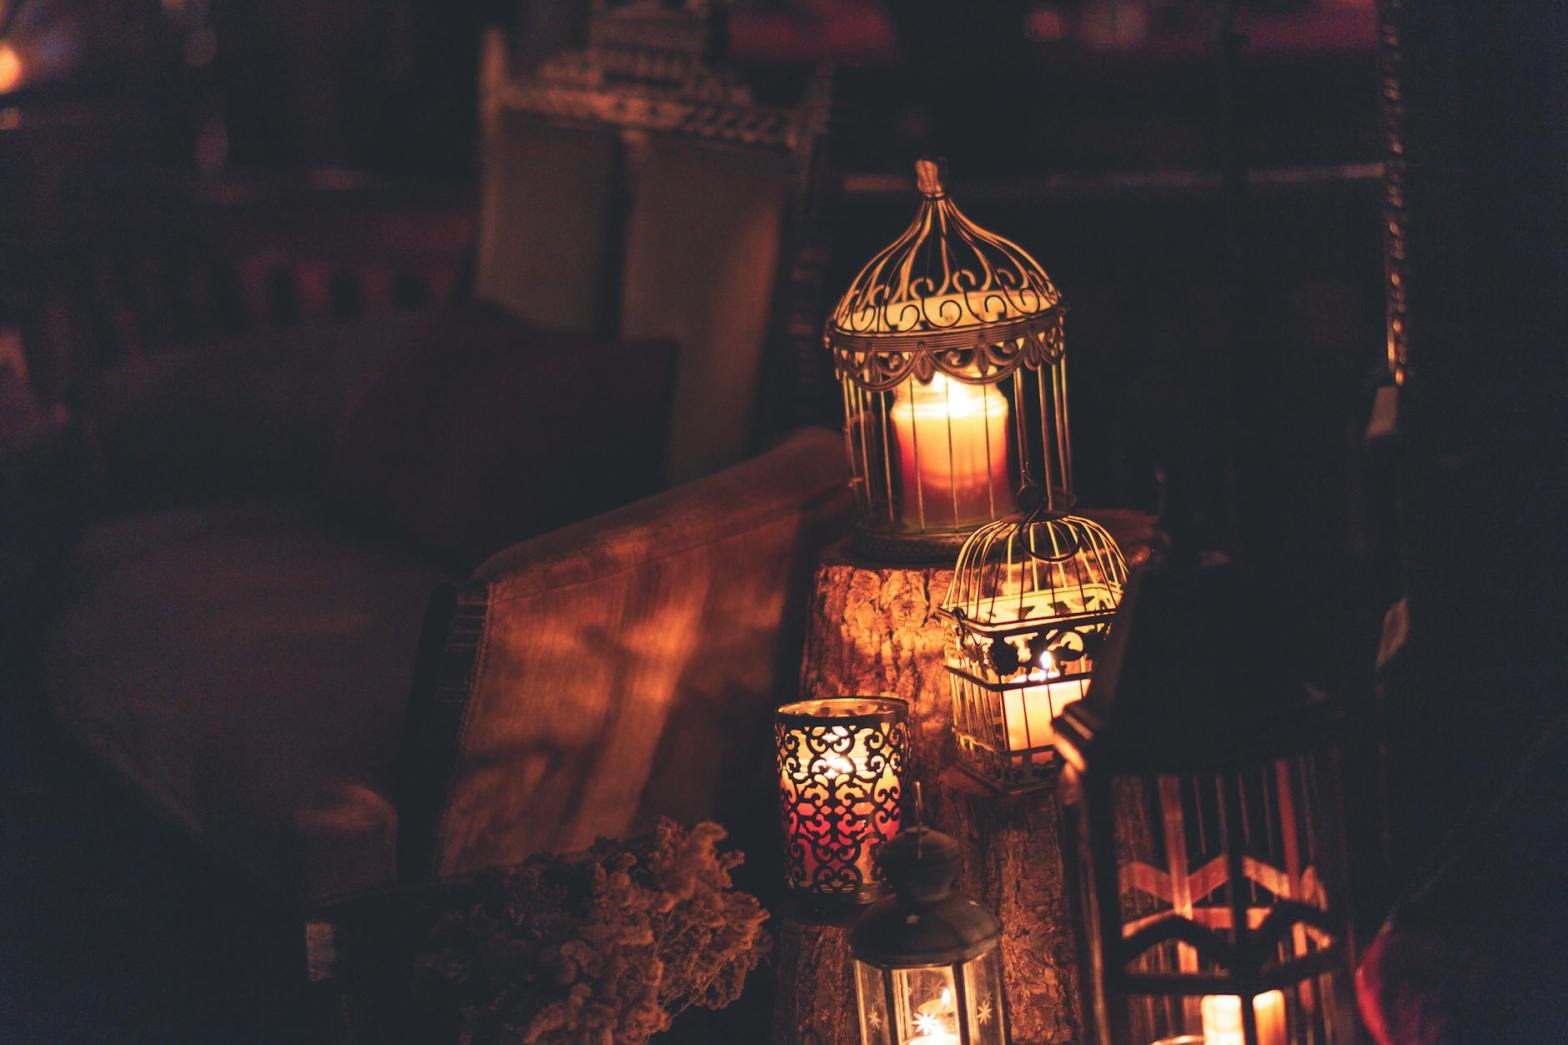
Look for existing light sources, such as streetlights, neon signs, or candles.

Tips:

  • Position your subject near the light source to reduce ISO needs.
  • Experiment with side lighting or backlighting for dramatic effects.

3. Light Painting

Use a flashlight or LED to “paint” light onto a subject during a long exposure.

How to Light Paint:

  • Set your camera on a tripod with a long exposure time (e.g., 10–30 seconds).
  • Use the light to highlight specific areas of the frame.

4. Astrophotography

Capturing the night sky requires specialized techniques.

  • Use a wide-angle lens with an aperture of f/2.8 or wider.
  • Set your shutter speed to the 500 rule: 500 divided by your focal length gives the maximum exposure time without star trails (e.g., 500 ÷ 20mm = 25 seconds).
  • Use a high ISO (e.g., ISO 3200) and shoot RAW for better detail.

5. Shoot During Blue Hour

The blue hour, just after sunset or before sunrise, provides soft, diffused light that enhances low-light scenes.


Composition Tips for Low-Light Photography

Strong composition is essential to elevate your low-light images.

1. Embrace Shadows

Use shadows to create mystery and depth in your images.


2. Include Reflections

Reflections on wet streets, glass, or water bodies can add texture and interest to your frame.


3. Simplify the Scene

Low light naturally emphasizes contrasts and shapes. Focus on key elements and avoid clutter.


4. Leading Lines

Use light trails, illuminated paths, or architectural elements to draw the viewer’s eye into the frame.


Post-Processing Low-Light Images

Post-processing is crucial to refine your low-light shots.

1. Exposure Adjustments

Recover details from shadows and highlights without overexposing.


2. Noise Reduction

Apply noise reduction selectively to avoid losing sharpness. Lightroom and Photoshop offer powerful noise-reduction tools.


3. Color Grading

Enhance the mood with careful adjustments to color balance, saturation, and contrast.


Common Challenges and How to Solve Them

1. Blurry Images

  • Solution: Use a tripod, faster shutter speed, or image stabilization.

2. Excessive Noise

  • Solution: Keep ISO within acceptable limits and apply noise reduction in post.

3. Focusing Issues

  • Solution: Use manual focus or focus on areas with more contrast.

Popular Low-Light Scenarios

1. Night Street Photography

Capture the energy of urban life with neon lights, car trails, and bustling streets.


2. Candlelit Portraits

Soft, warm light from candles creates intimate and atmospheric portraits.


3. Event Photography

Concerts, theater, or weddings often require quick adaptation to low light. Use fast lenses and burst mode to capture fleeting moments.


Conclusion

Low-light photography is as much about creativity as it is about technical precision. By understanding your camera’s capabilities, mastering key settings, and embracing the unique aesthetics of low-light environments, you can capture breathtaking images that transform darkness into art.

Practice, patience, and experimentation will help you turn challenges into opportunities for stunning photography. So venture out into the night, and let your camera unveil the beauty hidden in the shadows!


Action Shots: Freezing Motion and Capturing Dynamic Scenes

Action photography is all about energy, movement, and emotion. Whether you’re photographing a soccer game, a bird in flight, or a skateboarder performing tricks, capturing motion effectively requires a combination of technical skill, creative vision, and quick reflexes. This guide dives into techniques and tips for freezing motion and creating dynamic action shots that leap off the screen.


Understanding Motion in Photography

Motion in photography can be captured in two main ways:

  1. Freezing Motion: Stopping movement in its tracks, resulting in crisp, sharp images.
  2. Blurring Motion: Creating a sense of speed or fluidity by intentionally capturing movement as blur.

For action shots, freezing motion is often the goal, though some creative scenes benefit from intentional blur to convey speed. Let’s explore how to achieve each effect.


Freezing Motion: The Technical Essentials

Freezing motion requires controlling several camera settings to capture split-second moments with clarity.

1. Shutter Speed: The Key to Freezing Action

Shutter speed determines how long your camera’s sensor is exposed to light. To freeze motion, you need a very fast shutter speed, usually 1/500 second or faster.

  • General Guidelines:
    • Sports: Use 1/1000 second or faster for high-speed action like soccer, basketball, or track events.
    • Birds in Flight: Aim for 1/2000 second or faster to capture quick wing movements.
    • Everyday Motion: For children playing or casual street scenes, 1/500 second is usually sufficient.

Practical Tips:

  • Use your camera’s shutter priority mode (S or Tv) to control shutter speed directly.
  • Increase your ISO to allow for faster shutter speeds in low-light situations.

2. Autofocus: Keeping Up with the Action

Action photography requires precise and fast focusing to ensure your subject is sharp. Modern cameras offer advanced autofocus systems tailored for this purpose.

Autofocus Modes:

  • Continuous Autofocus (AI Servo/AF-C): Tracks moving subjects and adjusts focus dynamically.
  • Zone or Wide-Area AF: Lets the camera track subjects across a wider field of view, ideal for unpredictable movement.

Autofocus Tips:

  • Pre-focus on a spot where you anticipate the action will occur.
  • Use back-button focusing to separate focusing from the shutter button for greater control.

3. Burst Mode: Capturing the Perfect Moment

Sometimes the difference between a good action shot and a great one is a matter of milliseconds. Use burst mode (continuous shooting) to capture a sequence of images in rapid succession.

How to Use Burst Mode:

  • Enable the burst mode in your camera’s settings.
  • Hold the shutter button down to capture multiple frames as the action unfolds.

Pro Tip:

Choose the best shot later during post-processing. Look for dynamic poses, expressions, or peak moments of movement.


4. Stabilization and Support

While fast shutter speeds reduce motion blur, camera shake can still affect your shots. Use stabilization techniques to maintain sharpness.

Tools and Techniques:

  • Tripod or Monopod: A monopod offers stability without sacrificing mobility, especially for sports or wildlife.
  • Lens Stabilization: Many lenses have built-in optical stabilization to counteract minor movements.
  • Proper Handholding: Hold the camera with both hands, elbows tucked in, for maximum stability.

Composition for Dynamic Action Shots

Beyond technical settings, composition plays a critical role in creating impactful action photographs. A well-composed action shot tells a story and directs the viewer’s attention.

1. The Rule of Space

Leave space in the frame in front of the moving subject to emphasize direction and movement. For example:

  • A runner should have space to “run into.”
  • A car should have space ahead of it on the road.

2. Framing the Action

Use elements in the environment to frame the subject. For instance:

  • Capture a skateboarder through the railings of a staircase.
  • Frame a horse and rider between tree branches.

3. Capturing Expressions and Details

Focus on the subject’s face, hands, or other key details that convey emotion or action. Examples:

  • A soccer player’s intense expression during a goal attempt.
  • The splash of water droplets as a swimmer dives into the pool.

4. Include Context

Action shots can be more powerful when they show the environment. For instance:

  • Photograph a cyclist with the surrounding trail to highlight the terrain.
  • Include spectators to show the excitement of a sporting event.

Adding Motion Blur for Creative Effect

While freezing motion is common, deliberate motion blur can add drama and a sense of speed to your images.

1. Panning: Blurring the Background

Panning involves moving your camera along with the subject’s motion, keeping the subject sharp while blurring the background.

Steps to Pan Effectively:

  1. Select a slower shutter speed (e.g., 1/30 to 1/60 second).
  2. Focus on the subject and follow its motion smoothly.
  3. Press the shutter while continuing the motion.

Best for:

  • Cyclists, cars, or runners moving in a straight line.

2. Intentional Subject Blur

Capture movement trails by using a slower shutter speed while keeping the camera stationary. This technique works well for:

  • Dancers spinning or jumping.
  • Waves crashing on a shore.

Mastering Light for Action Shots

Light plays a significant role in action photography. The quality, direction, and intensity of light can either enhance or detract from your images.

1. Shooting in Natural Light

Natural light is ideal for most action photography, particularly during golden hour.

Tips:

  • Position yourself to capture sidelighting, which adds depth and dimension.
  • Use backlighting for dramatic silhouettes or rim lighting around the subject.

2. Using Artificial Light

For indoor action shots or low-light conditions, artificial lighting is often necessary.

Flash Photography:

  • Use an external flash to freeze motion indoors.
  • Consider using high-speed sync (HSS) to capture fast-moving subjects with flash.

3. Dealing with Shadows

Shadows can add drama but may also obscure details. Use fill light or reflectors to soften harsh shadows when necessary.


Action Photography in Different Scenarios

Let’s look at some popular action photography scenarios and how to approach them.

1. Sports Photography

  • Positioning: Stand at an angle where you can see the athlete’s face and the action clearly.
  • Lenses: Use telephoto lenses (e.g., 70–200mm) for distant action.
  • Settings: Shoot at 1/1000 second or faster to freeze the action.

2. Wildlife Photography

  • Patience is Key: Wait for the perfect moment, whether it’s a bird taking off or a deer leaping.
  • Silent Mode: Use your camera’s silent shooting mode to avoid startling animals.
  • Focus: Use single-point autofocus to lock onto fast-moving subjects.

3. Street Action

  • Spontaneity: Look for unplanned moments like a cyclist passing or a child running.
  • Environment: Include street signs, buildings, or bystanders to add context.

4. Adventure Photography

  • Dynamic Angles: Get creative with angles, such as shooting from below a climber or above a kayaker.
  • Weather: Embrace natural elements like rain or snow to add drama.

Post-Processing Action Shots

Post-processing is essential for refining and enhancing action photos.

1. Sharpening

Enhance the subject’s details, especially in sports or wildlife shots.

2. Cropping for Impact

Remove distractions and tighten the composition to emphasize the action.

3. Adjusting Colors and Contrast

Boost saturation and contrast to make the image pop.


Conclusion

Action photography combines technical precision with artistic creativity. By mastering shutter speed, autofocus, and composition, you can freeze moments of high energy and emotion. Whether you’re capturing a sports game, wildlife in motion, or street activity, the key is to anticipate the action and be ready to adapt.

Through practice, experimentation, and attention to detail, you’ll develop the skills to create dynamic action shots that tell powerful stories. So grab your camera, find the action, and start shooting!


Landscape Photography: Utilizing Depth and Perspective

Landscape photography is one of the most awe-inspiring genres in the photographic arts. It allows photographers to capture the grandeur, tranquility, or even the raw intensity of the natural world. At its core, landscape photography is about telling a story of a place—its scale, mood, and beauty. A key to mastering this genre is using depth and perspective to transform flat, two-dimensional images into immersive scenes that pull the viewer into the frame.

In this guide, we’ll explore advanced techniques for using depth, perspective, composition, and lighting to elevate your landscape photography.


The Foundations of Landscape Photography

Before diving into creative techniques, let’s cover some basic principles that form the foundation of stunning landscape photography:

  • Subject and Focal Point: Every great landscape image needs a point of interest—be it a mountain, tree, or winding path—to guide the viewer’s eye.
  • Lighting: Natural light, particularly during the golden hour (just after sunrise or before sunset), plays a pivotal role in landscape photography.
  • Patience: Great landscapes often require waiting for the perfect moment when the light, weather, and composition align.

Once these essentials are in place, you can begin experimenting with depth and perspective to bring your landscapes to life.


Creating Depth in Landscape Photography

Depth in photography is about making a flat image feel three-dimensional. By giving the viewer a sense of distance and scale, you can create more engaging and immersive photographs.

1. Foreground, Middleground, and Background

One of the simplest ways to create depth is by incorporating distinct layers into your composition:

  • Foreground: Adds interest and anchors the scene. Rocks, flowers, or streams can serve as excellent foreground elements.
  • Middleground: Often contains the main subject, like a mountain or a field.
  • Background: Completes the composition with distant elements like the sky, clouds, or horizon.

Practical Tips:

  • Use a wide-angle lens to exaggerate the spatial relationship between foreground and background elements.
  • Position your camera low to the ground to emphasize the foreground.

2. Leading Lines

Leading lines are natural or man-made elements that guide the viewer’s eye through the photograph, creating a sense of depth and movement. Examples include:

  • Roads, trails, or fences.
  • Rivers, streams, or shorelines.
  • Lines formed by shadows or patterns in the landscape.

How to Use Leading Lines:

  • Align the lines to converge toward the main subject, directing the viewer’s attention.
  • Experiment with diagonal or curving lines for a dynamic composition.

3. Layering with Atmosphere

Atmospheric elements like mist, fog, or haze can naturally separate layers in your landscape, adding depth and mood.

  • Fog and Mist: Creates a sense of mystery and softens distant elements.
  • Haze: Adds a gradual transition in tone and color, especially in mountain ranges.

Pro Tip:

Photograph during early morning or late evening when atmospheric effects are more pronounced.


4. Focus Techniques: Depth of Field

Depth of field (DoF) determines how much of your image is in sharp focus. In landscape photography, you often want a deep depth of field to keep everything from the foreground to the background sharp.

Achieving Maximum Depth of Field:

  • Use a small aperture (f/8 to f/16) to increase the DoF.
  • Focus about one-third of the way into the scene (hyperfocal distance) to maximize sharpness across the frame.
  • Use a tripod to compensate for the slower shutter speeds required by small apertures.

Utilizing Perspective in Landscape Photography

Perspective is how objects appear in relation to one another. Playing with perspective can dramatically alter the impact of your landscape photographs.

1. Wide-Angle Perspective

Wide-angle lenses exaggerate the scale and distance between objects, making foreground elements appear larger and more prominent. This technique works well when you want to emphasize intricate details in the foreground.

Techniques for Wide-Angle Landscapes:

  • Move closer to foreground objects to fill the frame.
  • Ensure the foreground elements are visually interesting, as they will dominate the scene.

2. Compressed Perspective

Telephoto lenses compress the distance between objects, making distant mountains or trees appear closer together. This technique is excellent for isolating specific parts of the landscape and creating a more intimate feel.

When to Use Compressed Perspective:

  • Highlight layers in the landscape, such as ridges or waves.
  • Create a sense of scale by juxtaposing large and small elements.

3. Point of View (POV)

Changing your camera’s position can significantly affect perspective and add variety to your landscapes.

Creative POV Ideas:

  • Low Angle: Place your camera near the ground to emphasize textures in the foreground.
  • High Angle: Climb to a higher vantage point to showcase the vastness of the scene.
  • Tilted Frame: Slightly tilting the camera can create dynamic, unconventional compositions.

Mastering Composition for Impactful Landscapes

Composition is the backbone of compelling landscape photography. By thoughtfully arranging elements in the frame, you can create harmony and balance.

1. The Rule of Thirds

Divide your frame into nine equal parts using two horizontal and two vertical lines. Place key elements (horizons, mountains, or trees) along these lines or at their intersections.

2. Golden Ratio

The golden ratio is a more advanced compositional technique that uses a spiral or grid to position elements in a naturally pleasing way.


3. Framing

Use natural elements like archways, tree branches, or cave openings to frame the scene. This draws the viewer’s attention and adds depth.


4. Negative Space

Leave empty areas in the frame to create a sense of simplicity and scale. A vast sky or an open field can evoke feelings of freedom and solitude.


Harnessing Light for Landscape Photography

Lighting is arguably the most critical factor in landscape photography. The right light can transform an ordinary scene into something extraordinary.

1. Golden Hour and Blue Hour

  • Golden Hour: Offers soft, warm light that enhances textures and colors.
  • Blue Hour: The period just before sunrise or after sunset, when the sky takes on a deep blue hue.

2. Backlighting

Photographing with the sun behind your subject can create stunning silhouettes or rim lighting on trees, leaves, or mountains.

3. Side Lighting

Side lighting adds depth and dimension by casting long shadows across the landscape.


Advanced Techniques for Landscape Photography

1. Long Exposures

Use long exposure settings to capture motion, such as flowing water, moving clouds, or star trails.

  • Use a neutral density (ND) filter to reduce light and allow for longer shutter speeds during the day.
  • Keep the camera steady with a tripod to prevent unwanted blur.

2. Panoramas

For expansive landscapes, stitch multiple images together to create a panoramic photograph. This is especially useful for scenes with wide vistas or dramatic skylines.


3. HDR Photography

High Dynamic Range (HDR) photography involves combining multiple exposures to balance highlights and shadows, particularly in high-contrast scenes.


Post-Processing for Depth and Perspective

Editing plays a vital role in fine-tuning your landscape images.

1. Enhancing Depth

  • Adjust contrast and clarity selectively to emphasize layers in the scene.
  • Use gradients to darken the sky and add dimension to the image.

2. Perspective Corrections

  • Straighten horizons and correct lens distortions for a polished look.

3. Color Grading

  • Warm tones can enhance sunsets, while cool tones work well for serene, moody landscapes.

Conclusion

Landscape photography is both a technical and artistic endeavor. By mastering depth and perspective, you can elevate your work from simply documenting a scene to creating breathtaking images that evoke emotion and wonder. Experiment with composition, lighting, and advanced techniques to develop your unique style and capture the beauty of the world around you.

Remember, the most important element in landscape photography is your connection to the scene. Let that passion guide your creativity, and the results will shine in your photographs.


Portrait Photography: Capturing Expressions and Mood

Portrait photography is an art that transcends the technical aspects of operating a camera. It is a powerful medium to capture the essence of a person, highlighting their emotions, expressions, and personality. To truly excel in portrait photography, one must learn not only the technical skills but also the creative techniques that bring out the best in their subjects. This guide delves into advanced methods for creating impactful portraits that evoke emotions and tell compelling stories.


The Importance of Mood and Expression

A great portrait does more than capture a likeness; it captures a feeling. Whether it’s joy, introspection, mystery, or confidence, mood and expression can transform a photograph from mundane to magical. The challenge lies in drawing out genuine emotions and using creative techniques to amplify their impact.

To master this art, you need to consider the following:

  • Understanding the Subject: Each individual is unique. Spend time getting to know your subject and understanding their personality.
  • Storytelling: A portrait can be a standalone image or part of a series that narrates a story. Define the mood and narrative you want to convey.
  • Connection: Establish trust and rapport with your subject to make them comfortable in front of the camera.

Creative Approaches to Capturing Expressions

1. Candid Portraiture

Candid portraits are a fantastic way to capture authentic emotions. Unlike posed photographs, these rely on observing and photographing subjects in natural settings or moments.

Techniques for Candid Portraits:

  • Blend In: Avoid drawing attention to yourself. Use longer focal lengths to shoot from a distance.
  • Stay Ready: Keep your camera settings optimized for the environment to capture fleeting moments.
  • Be Observant: Look for interactions, gestures, or glances that reveal personality and emotion.

Candid photography works particularly well in lifestyle shoots, where subjects are immersed in their activities, unaware of the camera.


2. Directing Poses for Expressions

While candid moments are beautiful, posed portraits offer another dimension of creativity and control. To capture genuine expressions in posed settings, the photographer plays the role of a director.

Tips for Encouraging Natural Expressions:

  • Give Simple Instructions: Avoid over-complicating directions. Instead of saying, “Smile naturally,” make them laugh with a lighthearted joke or a shared anecdote.
  • Engage in Conversation: Talk to your subject during the shoot. A relaxed conversation can elicit real emotions.
  • Use Props or Prompts: Encourage interaction with objects like books, hats, or instruments to create a sense of story and ease.
  • Explore Micro-Movements: Small tilts of the head, shifts in gaze, or changes in hand placement can add subtle dynamism to the pose.

3. Eye Contact and Gaze

The subject’s eyes often become the focal point of a portrait. They can convey a range of emotions and act as a window into the subject’s soul.

Techniques for Capturing the Gaze:

  • Direct Gaze: A strong, direct look into the camera creates an intimate connection with the viewer.
  • Off-Camera Gaze: Ask the subject to look at something beyond the frame to create intrigue or mystery.
  • Closed Eyes: Closed eyes can evoke serenity, contemplation, or vulnerability, offering a different emotional tone.

Using light to emphasize the eyes, such as catchlights, adds a touch of brilliance and life to the portrait.


4. Incorporating Motion

Adding motion to a portrait can infuse energy and mood. Whether it’s hair blowing in the wind or hands mid-gesture, movement brings dynamism to the frame.

Creative Motion Ideas:

  • Flowing Fabrics: Use scarves or dresses to create elegant, fluid motion.
  • Hair Movement: A fan or natural breeze can add a sense of vitality to the subject’s hair.
  • Expressive Hands: Encourage the subject to interact with their environment, adding storytelling elements to the image.
  • Walking or Dancing: Suggest simple actions like walking, twirling, or dancing to bring spontaneity to the session.

To effectively capture motion, adjust your shutter speed to either freeze the action or introduce intentional blur for artistic effects.


Mastering Lighting for Mood

Lighting plays a crucial role in shaping mood and expressions in portrait photography. The type, direction, and intensity of light can dramatically affect the emotional tone of the image.

1. Natural Light

Natural light is a versatile and accessible tool for portrait photographers. The time of day and weather conditions can influence its quality.

Golden Hour:

The soft, warm light during sunrise and sunset is ideal for creating romantic and flattering portraits.

Overcast Days:

Diffuse light on cloudy days eliminates harsh shadows, offering a softer and even illumination.

Window Light:

Positioning the subject near a window can create stunning, directional light indoors.


2. Studio Lighting

Studio lighting offers unparalleled control over how you illuminate your subject. Use one or multiple light sources to create specific effects.

Common Lighting Setups:

  • Rembrandt Lighting: A triangular highlight under one eye adds drama and depth.
  • Butterfly Lighting: A light placed above and in front of the subject creates flattering shadows under the nose and chin.
  • Split Lighting: Half of the face is lit while the other half remains in shadow, evoking a moody, mysterious feel.

3. Creative Lighting Techniques

  • Colored Gels: Add vibrant colors to your lighting setup to evoke specific emotions or themes.
  • Silhouettes: Position the subject against a strong backlight to create striking outlines.
  • Low-Key Lighting: Use minimal light and deep shadows for dramatic, high-contrast portraits.

Using Environment and Props to Enhance Mood

The setting and props in a portrait photograph contribute significantly to its narrative.

1. Environmental Portraits

Capture your subject in their natural environment to tell a story about their life, profession, or hobbies. For instance:

  • An artist in their studio.
  • A musician with their instrument.

Tips for Environmental Portraits:

  • Integrate the Background: Ensure the environment complements rather than distracts from the subject.
  • Use Depth: Incorporate foreground and background elements to add dimensionality.

2. Creative Props

Props can add context, color, and interaction to a portrait. Choose objects that are meaningful or visually engaging. Examples include:

  • Books, flowers, or hats.
  • Personal items that reflect the subject’s character.

Advanced Techniques for Expressive Portraits

1. Double Exposure

Combine two images into a single frame to create surreal, artistic portraits. For example, overlay a profile shot with a textured landscape.

2. Reflections

Use mirrors, water, or glass to introduce reflections, adding a layer of complexity and creativity.

3. Shadows and Patterns

Experiment with patterned shadows created by blinds, leaves, or lace to add texture and interest.

4. Bokeh Backgrounds

Use a wide aperture to create a blurred background filled with light or colorful details for a dreamy effect.


Post-Processing for Mood and Expression

Editing allows you to enhance the mood of your portraits further.

1. Color Grading

Adjust the tones to complement the mood. Warm tones can convey nostalgia, while cool tones evoke modernity or melancholy.

2. Dodge and Burn

Lighten or darken specific areas to guide the viewer’s eye and add depth to the portrait.

3. Texture and Clarity

Enhance skin textures and fine details, but maintain a natural look.

4. Black and White Conversion

Remove color to focus entirely on expression, light, and contrast.


Conclusion

Portrait photography is an exploration of emotion, personality, and storytelling. By combining creative techniques with a deep understanding of your subject, you can create compelling images that resonate on a personal and artistic level. Experiment with lighting, poses, and environments to refine your skills and push the boundaries of what’s possible in portraiture.

Remember, the best portraits are not just technically perfect—they are emotionally impactful, connecting the viewer with the subject in a meaningful way.


White Balance

Introduction to White Balance

White balance (WB) is a fundamental concept in photography that ensures colors appear natural under different lighting conditions. While it might seem like a minor detail, mastering white balance can transform your images from lackluster to vibrant. This chapter dives deep into understanding white balance, its importance, and how to use it effectively to enhance your photography.

What is White Balance?

White balance refers to the camera’s ability to adjust colors in your image to match the color temperature of the light source. Every light source has a specific color temperature, measured in Kelvin (K), which affects the hue of the light:

  • Warm light (e.g., incandescent bulbs) appears orange or yellow.
  • Cool light (e.g., daylight or fluorescent lighting) leans toward blue.

For instance, if you photograph a white object under warm indoor lighting, it may appear yellowish unless the camera compensates for the light’s warmth. Proper white balance ensures that white areas in the image look true to life, with other colors following suit.

Why White Balance Matters

White balance directly influences the mood, tone, and realism of your photos. An incorrect white balance can make a scene feel unnatural or evoke unintended emotions. For example:

  • Too Warm: Colors might look overly orange, losing detail and appearing unbalanced.
  • Too Cool: The scene might feel sterile or uninviting, with blue tints dominating the image.

By mastering white balance, photographers gain control over how colors are rendered, allowing them to preserve the authenticity of the scene or creatively adjust it for artistic effect.


White Balance Settings

Most cameras provide various white balance presets and a custom WB option to suit different scenarios. Here’s a breakdown of common presets:

1. Auto White Balance (AWB)

This is the default mode in most cameras, where the camera analyzes the scene and selects a white balance setting automatically.

  • Advantages:
    • Convenient and fast for changing conditions.
    • Works well in natural daylight or mixed lighting situations.
  • Limitations:
    • Struggles in extreme lighting conditions, such as strong artificial light or very warm/cool light sources.
    • Can lead to inconsistent results when shooting multiple images in the same environment.

2. Daylight

Designed for shooting under clear, sunny skies. This setting neutralizes the cooler tones of daylight, making colors appear natural.

  • Best for: Outdoor photography in direct sunlight.
  • Note: It may not work well in shaded or cloudy conditions.

3. Cloudy

Adds a slight warmth to counteract the cooler tones of overcast lighting.

  • Best for: Outdoor photography in cloudy or diffused light conditions.
  • Effect: Produces warmer, richer tones compared to the Daylight setting.

4. Shade

Designed to compensate for the cool tones often found in shaded areas, even on sunny days.

  • Best for: Portraits or subjects in the shade.
  • Effect: Warms up the image to create more natural and inviting tones.

5. Tungsten (Incandescent)

Adjusts for the warm, orange hues emitted by indoor tungsten lighting.

  • Best for: Shooting indoors with traditional light bulbs.
  • Effect: Produces neutral tones, but can make outdoor photos appear overly blue.

6. Fluorescent

Corrects for the cool or greenish cast of fluorescent lights.

  • Best for: Indoor photography under fluorescent lighting.
  • Effect: Creates a more balanced, neutral color palette.

7. Flash

Optimized for use with on-camera flash, which can produce slightly cool light.

  • Best for: Portraits or events using flash.
  • Effect: Warms up the scene to counteract the cool light of the flash.

8. Custom White Balance

Allows photographers to manually set the white balance using a reference image or gray card.

  • Advantages:
    • Precision in challenging lighting situations.
    • Ensures consistency across multiple images.
  • Limitations:
    • Requires extra steps and knowledge to use effectively.

Understanding Color Temperature

Color temperature is a key factor in white balance, influencing how warm or cool a photo appears. Below are typical color temperatures for common lighting conditions:

Light SourceApprox. Kelvin (K)Appearance
Candlelight1,500 KVery warm
Tungsten bulb2,700–3,200 KWarm/yellowish
Sunrise/Sunset3,000–4,000 KGolden tones
Fluorescent lights4,000–5,000 KNeutral/cool
Daylight (noon)5,000–6,500 KNeutral
Overcast/cloudy skies6,500–8,000 KCool/blue
Shade7,000–10,000 KVery cool

A deeper understanding of these values helps photographers adjust white balance manually when needed.


White Balance in Creative Photography

While accurate white balance is essential for realism, deviating from standard settings can enhance creativity.

1. Intensifying Mood

  • Warm Tones: Use settings like Shade or Cloudy to enhance warmth and create a cozy, inviting mood.
  • Cool Tones: Apply Tungsten or adjust the WB manually to evoke a sense of calm, mystery, or detachment.

2. Color Accents

Deliberately incorrect white balance can emphasize certain colors, such as making skies bluer or sunset hues more dramatic.

3. Black and White Photography

White balance can subtly influence the tonal range of black-and-white photos. Experiment with different settings to see how they affect contrast and brightness.


White Balance in Post-Processing

If your images don’t turn out as expected, post-processing software offers tools to adjust white balance:

1. Raw vs. JPEG Files

  • RAW: Retains all color data, allowing greater flexibility to tweak white balance without degrading image quality.
  • JPEG: Changes to white balance are more limited and can result in quality loss.

2. Tools in Editing Software

  • Temperature Slider: Adjusts the warmth or coolness of the image.
  • Tint Slider: Balances green and magenta tones.
  • Eyedropper Tool: Select a neutral gray or white point in the image to set the white balance automatically.

Popular software like Adobe Lightroom, Photoshop, and Capture One simplifies these adjustments, giving photographers control even after the shot is taken.


Tips for Mastering White Balance

  1. Understand Your Light Source: Identify the dominant light source and its color temperature before shooting.
  2. Use a Gray Card: A gray card helps set custom white balance accurately by providing a neutral reference point.
  3. Shoot in RAW: Always shoot in RAW to retain maximum flexibility for adjusting white balance during editing.
  4. Experiment with Presets: Familiarize yourself with how each white balance preset affects your images.
  5. Check Your Histogram: Extreme color casts can affect exposure readings, so use the histogram to verify balance.
  6. Take Test Shots: For critical shoots, take test shots with different white balance settings to compare results.

Conclusion

White balance is a subtle yet powerful tool in photography that ensures colors remain true to life or are creatively manipulated to enhance the image. By understanding the principles of color temperature and practicing with various settings, photographers can elevate their work to professional standards. Whether you’re aiming for naturalism or artistic expression, mastering white balance is a skill that will unlock new dimensions in your photographic journey.


Focus Techniques: Autofocus vs. Manual Focus

Focus is one of the most critical aspects of photography. Without proper focus, even the most beautifully composed and perfectly exposed photographs can fall flat. To achieve sharp, captivating images, it is essential to understand focus techniques, particularly the use of autofocus (AF) and manual focus (MF). Each method has its strengths and weaknesses, and knowing when and how to use them will elevate your photography.


Understanding Focus

Focus refers to the process of adjusting the lens to render the subject sharp and clear in the final image. It determines which part of the image appears sharpest, creating a focal point for the viewer. Modern cameras offer both autofocus and manual focus capabilities, providing photographers with flexibility.

Autofocus relies on the camera’s internal systems to determine and lock focus on a subject. In contrast, manual focus allows the photographer to control the focus by physically adjusting the lens. The choice between these two methods depends on the subject, shooting conditions, and your creative intent.


Autofocus (AF)

Autofocus systems are designed to quickly and accurately focus on a subject, making them indispensable for many types of photography. Autofocus can be broken down into two main types: phase detection and contrast detection.

How Autofocus Works

  1. Phase Detection:
    • Common in DSLRs and advanced mirrorless cameras, phase detection compares two images captured by the camera sensor to calculate focus. It is fast and effective, especially in well-lit conditions.
  2. Contrast Detection:
    • Found in many mirrorless and compact cameras, this method analyzes the image directly on the sensor to find the point of highest contrast, indicating sharp focus. While highly accurate, it can be slower, particularly in low light.

Autofocus Modes

Modern cameras offer a variety of autofocus modes tailored to different scenarios:

  1. Single-Point AF:
    • The camera focuses on a single point chosen by the photographer. Ideal for stationary subjects like portraits or still-life photography.
  2. Zone AF:
    • Focuses on a broader area, useful when photographing moving subjects like wildlife or sports.
  3. Tracking AF (Continuous AF):
    • Continuously adjusts focus to follow a moving subject, perfect for action shots or video recording.
  4. Eye/Face Detection AF:
    • Specifically designed to detect and lock focus on human or animal eyes, ensuring portraits are sharp and engaging.

Advantages of Autofocus

  • Speed and Convenience: Modern autofocus systems are incredibly fast, making them ideal for capturing fleeting moments.
  • Accuracy with Technology: Features like eye detection and subject tracking ensure precision.
  • Ease of Use: Perfect for beginners or situations where manual focus adjustments are impractical.

Challenges of Autofocus

  • Low-Light Performance: Autofocus may struggle in dim lighting or low-contrast scenes.
  • Specific Focal Points: The camera’s autofocus system might not lock onto the exact subject you want.
  • Creative Limitations: In some situations, autofocus may not allow the level of control required for specific artistic effects.

Manual Focus (MF)

Manual focus puts the photographer in full control of the focusing process. While it requires more skill and time, it offers unparalleled precision and creative flexibility.

How Manual Focus Works

Using manual focus involves rotating the focus ring on the lens to adjust the focus distance. Many modern cameras assist with manual focusing through tools like focus peaking and magnified views on the screen or electronic viewfinder.

When to Use Manual Focus

  1. Low-Light Conditions:
    • Autofocus often struggles in dim environments. Manual focus allows you to achieve clarity even in challenging lighting.
  2. Macro Photography:
    • When working with extremely close subjects, manual focus ensures pinpoint accuracy.
  3. Landscape Photography:
    • For vast scenes requiring focus on specific elements or achieving maximum depth of field, manual focus is invaluable.
  4. Creative Effects:
    • Manual focus lets you intentionally blur parts of an image, creating a dreamy, artistic look.

Advantages of Manual Focus

  • Precision: Allows for exact focus on the desired subject, especially in complex scenes.
  • Control: Essential for creative photography requiring unconventional focus points.
  • Reliability: Works consistently in situations where autofocus may fail, such as low contrast or low light.

Challenges of Manual Focus

  • Slower Process: Achieving precise focus takes time, making it less practical for fast-paced scenarios.
  • Steeper Learning Curve: Beginners may find manual focus intimidating and challenging to master.
  • Risk of Error: Without proper techniques, manual focus can lead to missed shots or soft images.

Comparing Autofocus and Manual Focus

Use Cases for Autofocus

  • Sports and Wildlife Photography:
    • Speed and tracking capabilities make autofocus essential for fast-moving subjects.
  • Portrait Photography:
    • Eye and face detection ensure the subject’s eyes are sharp.
  • Event Photography:
    • In dynamic, unpredictable environments, autofocus offers the reliability needed to capture moments as they unfold.

Use Cases for Manual Focus

  • Macro Photography:
    • Fine adjustments enable precise focus on tiny subjects.
  • Astrophotography:
    • Focusing on stars or distant objects requires manual adjustment.
  • Filmmaking:
    • Manual focus allows seamless control over focus pulls and creative storytelling.

Hybrid Approach

Many photographers use both techniques in tandem. For example, starting with autofocus to achieve a rough focus and then switching to manual for fine-tuning.


Tools to Enhance Focus Techniques

Modern cameras and lenses come equipped with features to enhance both autofocus and manual focus:

  1. Focus Peaking:
    • Highlights the areas in focus, aiding manual focusing.
  2. Magnified View:
    • Zooms into the focus area, allowing for precise adjustments.
  3. Customizable Focus Points:
    • Select specific areas for autofocus to prioritize.
  4. Touchscreen Focus:
    • Tap-to-focus functionality simplifies autofocus operation.

Tips for Mastering Focus

  1. Practice Manual Focus:
    • Spend time learning manual focus techniques to understand depth of field and focal planes better.
  2. Use a Tripod:
    • Stabilize your camera for sharper focus, especially when using manual focus.
  3. Understand Focus Modes:
    • Familiarize yourself with your camera’s autofocus modes and when to use them.
  4. Experiment with Depth of Field:
    • Play with aperture settings to achieve creative effects like background blur or full-scene sharpness.
  5. Inspect Your Images:
    • Use your camera’s playback zoom to check focus accuracy after capturing shots.

Conclusion

Both autofocus and manual focus are essential tools in a photographer’s arsenal. By understanding their unique strengths and limitations, you can make informed choices to suit any scenario. Autofocus excels in speed and convenience, while manual focus provides precision and creative control. Mastery of these focus techniques will empower you to capture sharp, compelling images, elevating your photography to new heights. The key lies in knowing your gear, practicing regularly, and experimenting to discover your preferred focus style.

Manual Mode: Taking Control of Your Camera

Photography is as much a technical skill as it is an art form, and mastering your camera settings is a critical step in achieving creative control over your images. At the heart of this control lies Manual Mode, a feature that empowers photographers to make deliberate decisions about exposure, focus, and artistic expression. In this chapter, we will delve into the intricacies of Manual Mode, equipping you with the knowledge and confidence to harness its full potential.


What is Manual Mode?

Manual Mode is a camera setting that places all exposure decisions—aperture, shutter speed, and ISO—into the hands of the photographer. Unlike Auto Mode, where the camera calculates these settings, Manual Mode allows you to override automatic functions and tailor your images according to your vision.


The Core Elements of Manual Mode

1. Aperture

Aperture refers to the opening in the lens that allows light to pass through to the camera sensor. Measured in f-stops, aperture not only controls the amount of light entering the camera but also determines the depth of field.

Key Considerations:

  • Wide Aperture (Low f-number, e.g., f/1.8): Allows more light in, resulting in a shallow depth of field (blurry background). Ideal for portraits and low-light scenarios.
  • Narrow Aperture (High f-number, e.g., f/16): Allows less light, resulting in a greater depth of field (sharp from foreground to background). Perfect for landscapes and architectural photography.

Practical Exercise: Experiment with different aperture settings in Manual Mode. Capture the same subject with varying f-stops to observe how the background blur changes.


2. Shutter Speed

Shutter speed controls the length of time the camera’s sensor is exposed to light. Measured in fractions of a second (e.g., 1/250), it determines motion blur or freezing action in your photos.

Key Considerations:

  • Fast Shutter Speed (e.g., 1/1000): Freezes motion, ideal for action shots like sports or wildlife.
  • Slow Shutter Speed (e.g., 1/10): Captures motion blur, suitable for creative effects like light trails or flowing water.

Practical Exercise: Use a tripod and capture a waterfall at various shutter speeds to see how the movement of water changes from frozen to silky smooth.


3. ISO

ISO measures the camera sensor’s sensitivity to light. A lower ISO (e.g., 100) produces less noise and is ideal for bright conditions. A higher ISO (e.g., 3200) increases sensitivity, useful in low-light situations but at the cost of added noise.

Key Considerations:

  • Low ISO: Provides cleaner images with minimal grain but requires more light.
  • High ISO: Enables shooting in dim environments but introduces noise.

Practical Exercise: Take a series of photos in dim lighting, gradually increasing the ISO to understand how it affects image quality.


How the Exposure Triangle Comes into Play

Manual Mode is the playground of the Exposure Triangle: the interplay of aperture, shutter speed, and ISO. Adjusting one component necessitates compensatory changes in the others to maintain proper exposure.

Example Scenario:

  • If you widen the aperture (e.g., f/2.8) to let in more light, you might need to use a faster shutter speed to prevent overexposure.
  • Conversely, if you’re shooting in low light with a narrow aperture (e.g., f/11), you can increase ISO or slow the shutter speed to achieve proper exposure.

Practical Exercise: Choose a static subject and take three shots:

  1. Balanced exposure using default settings.
  2. Adjust one element (e.g., widen aperture) and compensate by changing another (e.g., increase shutter speed).
  3. Overexpose and underexpose intentionally to observe the effects.

Why Manual Mode Matters

Creative Freedom

Manual Mode liberates you from the constraints of pre-determined settings, enabling you to:

  • Control depth of field for artistic effects.
  • Manipulate motion blur to add drama.
  • Choose exposure levels for high-contrast or low-key shots.

Consistency

In challenging lighting conditions, Manual Mode provides consistent results that Auto Mode may struggle to achieve, such as:

  • Backlit scenes.
  • Studio lighting setups.
  • Low-light environments.

Skill Development

Using Manual Mode enhances your understanding of photography fundamentals. Over time, you’ll develop an intuitive sense for exposure settings, making adjustments on the fly.


Tips for Success in Manual Mode

Start with the Basics

Begin by mastering each component of the Exposure Triangle individually. Gradually experiment with combining them.

Use the Light Meter

Your camera’s built-in light meter is a valuable tool for gauging exposure. In Manual Mode, it provides feedback on whether your image is underexposed, overexposed, or correctly exposed.

Practical Tip: Aim for a balanced meter reading, but don’t be afraid to override it for creative reasons.

Shoot in RAW Format

RAW files retain more image data, allowing greater flexibility in post-processing. This is particularly useful if your manual settings aren’t perfect.

Practice in Controlled Environments

Experimenting indoors or in stable lighting conditions helps you focus on settings without external distractions.

Analyze Your Photos

Review your images on a larger screen to identify patterns in your settings. Use metadata to learn from your successes and mistakes.


Overcoming Common Challenges

Balancing Exposure

Achieving the perfect balance can be tricky. Bracketing—taking multiple shots at slightly different exposures—helps you determine the best settings.

Dealing with Low Light

Use a tripod and slower shutter speed to avoid noise from high ISO settings. Add external lighting or reflectors when necessary.

Managing Motion Blur

Stabilize your camera with a tripod or increase shutter speed to eliminate unwanted blur. For intentional blur, pan with the subject to create a sense of motion.


Manual Mode for Different Scenarios

Portraits

  • Wide aperture for blurred backgrounds.
  • Low ISO for cleaner images.
  • Adjust shutter speed to avoid camera shake.

Landscapes

  • Narrow aperture for greater depth of field.
  • Use a tripod and slower shutter speed for sharp details.
  • Low ISO for minimal noise.

Action and Sports

  • Fast shutter speed to freeze motion.
  • Moderate ISO for flexibility in changing light.
  • Adjust aperture to balance depth of field and exposure.

Night Photography

  • High ISO to capture light without flash.
  • Slow shutter speed with a tripod.
  • Manual focus for precise control.

Conclusion

Mastering Manual Mode transforms you from a passive observer into an active creator. By taking control of aperture, shutter speed, and ISO, you’ll unlock a world of creative possibilities and develop a deeper connection to your craft. Practice is key—start small, experiment boldly, and watch your photography evolve.

Lighting in Photography

Lighting is the soul of photography. The way light interacts with your subject defines the mood, tone, and overall impact of your image. By understanding and manipulating lighting, you can transform ordinary scenes into extraordinary photographs. This chapter delves into the fundamentals of lighting, types of light, and practical techniques to help you master this essential aspect of photography.


The Importance of Lighting

Light is the primary medium of photography. Without it, there’s no image. The direction, intensity, color, and quality of light significantly influence how your subject appears and how your image is perceived. Proper lighting:

  • Defines Shapes and Textures: Light can highlight details, creating depth and dimension.
  • Sets the Mood: Soft, diffused light creates a gentle atmosphere, while harsh, direct light conveys drama.
  • Directs Attention: Bright areas naturally draw the viewer’s eye, allowing you to emphasize specific elements.

Types of Lighting Sources

Photography utilizes two primary categories of light: natural and artificial. Each offers unique advantages and challenges.

1. Natural Light

Natural light comes from the sun, and its characteristics change throughout the day and in different weather conditions.

  • Golden Hour: The hour after sunrise and before sunset provides warm, soft, and diffused light. Perfect for portraits and landscapes.
  • Blue Hour: The time just before sunrise or after sunset offers cool, subtle tones ideal for atmospheric shots.
  • Midday Light: Harsh and direct, it creates strong shadows and high contrast. Use reflectors or shade to soften it.
  • Overcast Light: Cloudy skies act as a giant diffuser, providing soft, even lighting without harsh shadows.

2. Artificial Light

Artificial light is any man-made light source, offering consistent and controllable conditions.

  • Continuous Lights: Like LED panels and tungsten bulbs, these allow you to see how light falls on your subject in real time.
  • Flash/Strobes: These provide intense bursts of light, excellent for freezing motion or illuminating scenes.
  • Studio Lights: Professional setups often include softboxes, umbrellas, and reflectors for precise control.
  • Practical Lights: Everyday sources like lamps, candles, or neon signs add creative elements to your shots.

Characteristics of Light

To use light effectively, you must understand its key characteristics:

1. Direction

The angle and direction of light relative to your subject determine shadows and highlights.

  • Front Light: Illuminates the subject directly, minimizing shadows. Ideal for evenly lit portraits but can appear flat.
  • Side Light: Casts strong shadows, adding depth and texture. Great for emphasizing details.
  • Back Light: Creates silhouettes and dramatic effects by placing the light source behind the subject.
  • Top Light: Often used in product photography to mimic natural overhead light.
  • Bottom Light: Rarely natural, it’s used for dramatic or eerie effects in creative setups.

2. Quality

Light quality refers to how soft or hard it appears.

  • Hard Light: Creates sharp, defined shadows. Achieved with small, direct sources like the sun or a bare bulb.
  • Soft Light: Produces gentle, gradual shadows. Achieved by diffusing light with clouds, softboxes, or reflectors.

3. Intensity

The brightness of light influences exposure and mood.

  • High-Intensity Light: Creates bold, high-contrast images.
  • Low-Intensity Light: Yields softer, more subdued results.

4. Color Temperature

Measured in Kelvin (K), color temperature affects the mood and realism of your photos.

  • Warm Light (2000K-4000K): Produces yellowish tones, resembling candlelight or sunrise.
  • Neutral Light (4000K-5000K): Balanced white light, similar to midday sun.
  • Cool Light (5000K-6500K): Bluish tones, often seen in shade or cloudy conditions.

Tools for Controlling Light

Mastering lighting requires tools to shape, diffuse, or enhance light:

  • Reflectors: Bounce light onto the subject to fill shadows. Available in silver (bright), gold (warm), white (neutral), and black (subtract light).
  • Diffusers: Soften harsh light, creating more flattering illumination.
  • Softboxes and Umbrellas: Spread light evenly for studio setups.
  • Gels: Add color to your light source for creative effects.
  • Flags and Gobos: Block or shape light to create patterns or control spill.

Lighting Techniques

1. Rembrandt Lighting

Named after the painter, this technique creates a triangle of light on the shadowed cheek of the subject. It’s popular for portraits as it adds depth and drama.

2. Butterfly Lighting

Positioning the light above and directly in front of the subject creates a butterfly-shaped shadow under the nose. This is flattering for glamorous or beauty photography.

3. Split Lighting

Light hits one side of the subject, leaving the other side in shadow. It’s ideal for creating intense, moody portraits.

4. Loop Lighting

The light is positioned slightly to the side and above the subject, creating a small shadow of the nose that loops onto the cheek.

5. High-Key and Low-Key Lighting

  • High-Key Lighting: Bright, evenly lit scenes with minimal shadows. Used for cheerful, clean aesthetics.
  • Low-Key Lighting: Predominantly dark scenes with selective highlights. Perfect for dramatic and mysterious looks.

Creative Lighting Ideas

1. Silhouettes

Place your subject against a bright background, like a sunset, and expose for the background to create striking silhouettes.

2. Lens Flares

Shooting towards a strong light source can create artistic flares. Experiment with angles to control the intensity.

3. Bokeh

Use a wide aperture to blur background lights into beautiful, soft circles.

4. Light Trails

Long exposures with moving light sources, like cars or sparklers, produce dynamic trails.

5. Shadow Play

Use shadows creatively to add intrigue or patterns to your composition.


Common Lighting Mistakes and How to Avoid Them

  1. Overexposure: Check your histogram to ensure highlights aren’t blown out.
  2. Underexposure: Avoid losing details in shadows by using reflectors or increasing light.
  3. Harsh Shadows: Diffuse direct light or use fill light to soften shadows.
  4. Unwanted Color Casts: Correct color temperature in-camera or during post-processing.
  5. Flat Lighting: Introduce shadows to add depth and dimension.

Post-Processing Tips for Enhancing Light

  • Adjust Exposure: Fine-tune brightness levels to achieve the desired look.
  • Dodge and Burn: Lighten or darken specific areas to emphasize key elements.
  • White Balance: Correct any unwanted color casts.
  • Highlight and Shadow Recovery: Bring back lost details in extreme lighting conditions.
  • Add Vignettes: Focus attention on the subject by darkening the edges of the frame.

Practice Exercises

  1. Golden Hour Shoot: Capture a subject during golden hour to practice working with soft, warm light.
  2. Shadow Exploration: Use a single light source to create dramatic shadows.
  3. Reflector Usage: Experiment with reflectors to fill in shadows and see the difference it makes.
  4. Artificial Light Setup: Create a simple studio setup with one light and a diffuser to practice control.
  5. Silhouettes: Shoot backlit subjects to understand how exposure affects the image.

Conclusion

Lighting is the cornerstone of photography. By mastering its various aspects—from natural light to artificial setups—you can unlock endless creative possibilities. Remember, the best way to learn is by experimenting with different lighting scenarios and observing how they transform your images. With practice and attention to detail, you’ll develop the skills to harness light as a powerful storytelling tool.

Composition Basics

Photography is not just about pointing a camera and clicking a button; it is about creating images that communicate emotion, tell a story, or captivate the viewer’s attention. Composition is the artful arrangement of visual elements within the frame, and mastering its fundamentals can elevate your photography from ordinary to extraordinary. This chapter explores key principles and techniques to help you compose compelling images.


The Importance of Composition

Composition guides the viewer’s eye and emphasizes the subject, creating balance and harmony within the frame. A well-composed photograph captures attention, evokes emotion, and leaves a lasting impression. While some aspects of composition come naturally, many can be learned and refined through practice.


1. Rule of Thirds

The rule of thirds is one of the most well-known and effective principles in photography. It involves dividing the frame into nine equal parts by two horizontal and two vertical lines. Placing your subject along these lines or at their intersections creates a balanced and visually pleasing composition.

Key Concepts

  • Dynamic Balance: Placing the subject off-center adds tension and interest compared to centering it.
  • Guiding the Eye: The rule of thirds naturally leads the viewer’s eye through the image.

Practical Applications

  • Landscapes: Position the horizon along the top or bottom third, rather than splitting the frame in half.
  • Portraits: Place the subject’s eyes at one of the intersection points.

Breaking the Rule

While the rule of thirds is effective, don’t hesitate to break it for creative purposes. Centered compositions or unconventional placements can add drama or symmetry.


2. Leading Lines

Leading lines direct the viewer’s gaze through the image, often towards the subject. These lines can be literal (roads, bridges) or implied (shadows, patterns).

Key Concepts

  • Types of Lines: Horizontal lines convey stability, vertical lines suggest strength, and diagonal lines add dynamism.
  • Natural vs. Artificial: Leading lines can be found in nature (rivers, tree branches) or man-made structures (railings, pathways).

Practical Applications

  • Use leading lines to draw attention to your subject.
  • Experiment with converging lines to create depth and perspective.

3. Framing

Framing involves using elements within the scene to create a natural frame around your subject. This technique adds context, depth, and focus to your image.

Key Concepts

  • Natural Frames: Tree branches, doorways, windows, or archways.
  • Depth and Context: Frames create layers, adding a three-dimensional feel.

Practical Applications

  • Find opportunities to shoot through objects for creative framing.
  • Use frames to block distractions and highlight the subject.

4. Symmetry and Patterns

Humans are naturally drawn to symmetry and patterns. Incorporating these elements creates a sense of order and harmony in your images.

Key Concepts

  • Symmetry: Achieved when both halves of an image mirror each other. Symmetry is often found in architecture and reflections.
  • Patterns: Repeated shapes, lines, or colors create rhythm and structure.

Practical Applications

  • Look for symmetry in landscapes (e.g., reflections in water) or man-made environments.
  • Break a pattern with a contrasting element to create visual interest.

5. Depth and Perspective

Creating a sense of depth transforms a flat photograph into a rich, immersive experience. Perspective helps convey the scale and spatial relationships within the frame.

Key Concepts

  • Foreground, Midground, Background: Including elements at varying distances adds layers.
  • Vanishing Point: Lines converging towards a point create depth.
  • Overlapping Elements: Placing one subject in front of another emphasizes their spatial relationship.

Practical Applications

  • Use a wide-angle lens to exaggerate perspective.
  • Shoot at eye level or experiment with low and high angles to alter perspective.

6. Negative Space

Negative space refers to the empty or unoccupied areas in an image. Used effectively, it emphasizes the subject and creates a sense of simplicity and elegance.

Key Concepts

  • Balancing Space: Negative space should complement, not overwhelm, the subject.
  • Minimalism: Often associated with negative space, minimalism highlights essential elements.

Practical Applications

  • Use negative space to isolate the subject and create a clean composition.
  • Experiment with sky, water, or plain backgrounds to add contrast.

7. Color Theory

Colors evoke emotions and influence how viewers perceive an image. Understanding color theory helps you create harmonious and impactful compositions.

Key Concepts

  • Color Harmony: Complementary colors (e.g., blue and orange) create contrast, while analogous colors (e.g., blue and green) create harmony.
  • Color Psychology: Warm colors (red, yellow) evoke energy, while cool colors (blue, green) convey calmness.

Practical Applications

  • Use color contrast to draw attention to your subject.
  • Experiment with monochromatic schemes for a cohesive look.

8. Balance

Balance ensures that no part of the image feels too heavy or visually dominant. It’s about distributing elements in a way that feels natural and pleasing.

Key Concepts

  • Symmetrical Balance: Equal visual weight on both sides of the frame.
  • Asymmetrical Balance: Unequal distribution that still feels harmonious.
  • Radial Balance: Elements radiating from a central point.

Practical Applications

  • Use contrasting elements to balance large, dominant subjects.
  • Balance colors, textures, or shapes to create visual harmony.

9. Cropping and Aspect Ratio

How you frame and crop an image impacts its composition and storytelling. Aspect ratio determines the dimensions of your frame, influencing how elements are arranged.

Key Concepts

  • Common Ratios: 3:2 (traditional photography), 4:3 (standard digital), and 16:9 (widescreen).
  • Cropping: Focuses attention by eliminating distractions or reframing the subject.

Practical Applications

  • Use cropping to refine your composition in post-processing.
  • Experiment with unconventional aspect ratios for creative effects.

10. Golden Ratio and Spirals

The golden ratio (1:1.618) is a mathematical principle often found in nature, art, and architecture. It creates aesthetically pleasing compositions.

Key Concepts

  • Golden Spiral: A spiral overlay that guides the viewer’s eye through the frame.
  • Phi Grid: Similar to the rule of thirds but based on the golden ratio.

Practical Applications

  • Use the golden spiral to arrange subjects and leading lines.
  • Combine with other compositional techniques for dynamic results.

Developing Your Eye for Composition

Composition is a skill honed through practice and observation. Train your eye by analyzing photographs, studying art, and experimenting with different techniques.

Exercises

  • Study Masterpieces: Analyze the work of renowned photographers and painters for compositional insights.
  • Practice One Rule: Focus on one technique (e.g., leading lines) during a shoot.
  • Experiment: Break traditional rules and observe the results.
  • Review and Reflect: Critique your own photos to identify strengths and areas for improvement.

Tools for Better Composition

Modern cameras and editing tools offer features to assist with composition:

  • Grid Overlays: Activate the rule of thirds or golden ratio grids in your camera settings.
  • Live View: Compose shots using your camera’s screen for precise adjustments.
  • Post-Processing Tools: Refine composition with cropping, straightening, and color adjustments.

Conclusion

Mastering composition is an ongoing journey that transforms how you see and capture the world. By understanding and applying these basics—from the rule of thirds to color theory—you can create images that resonate and inspire. Remember, rules are guidelines; let your creativity lead the way as you develop your unique photographic style.