Mirrorless Cameras

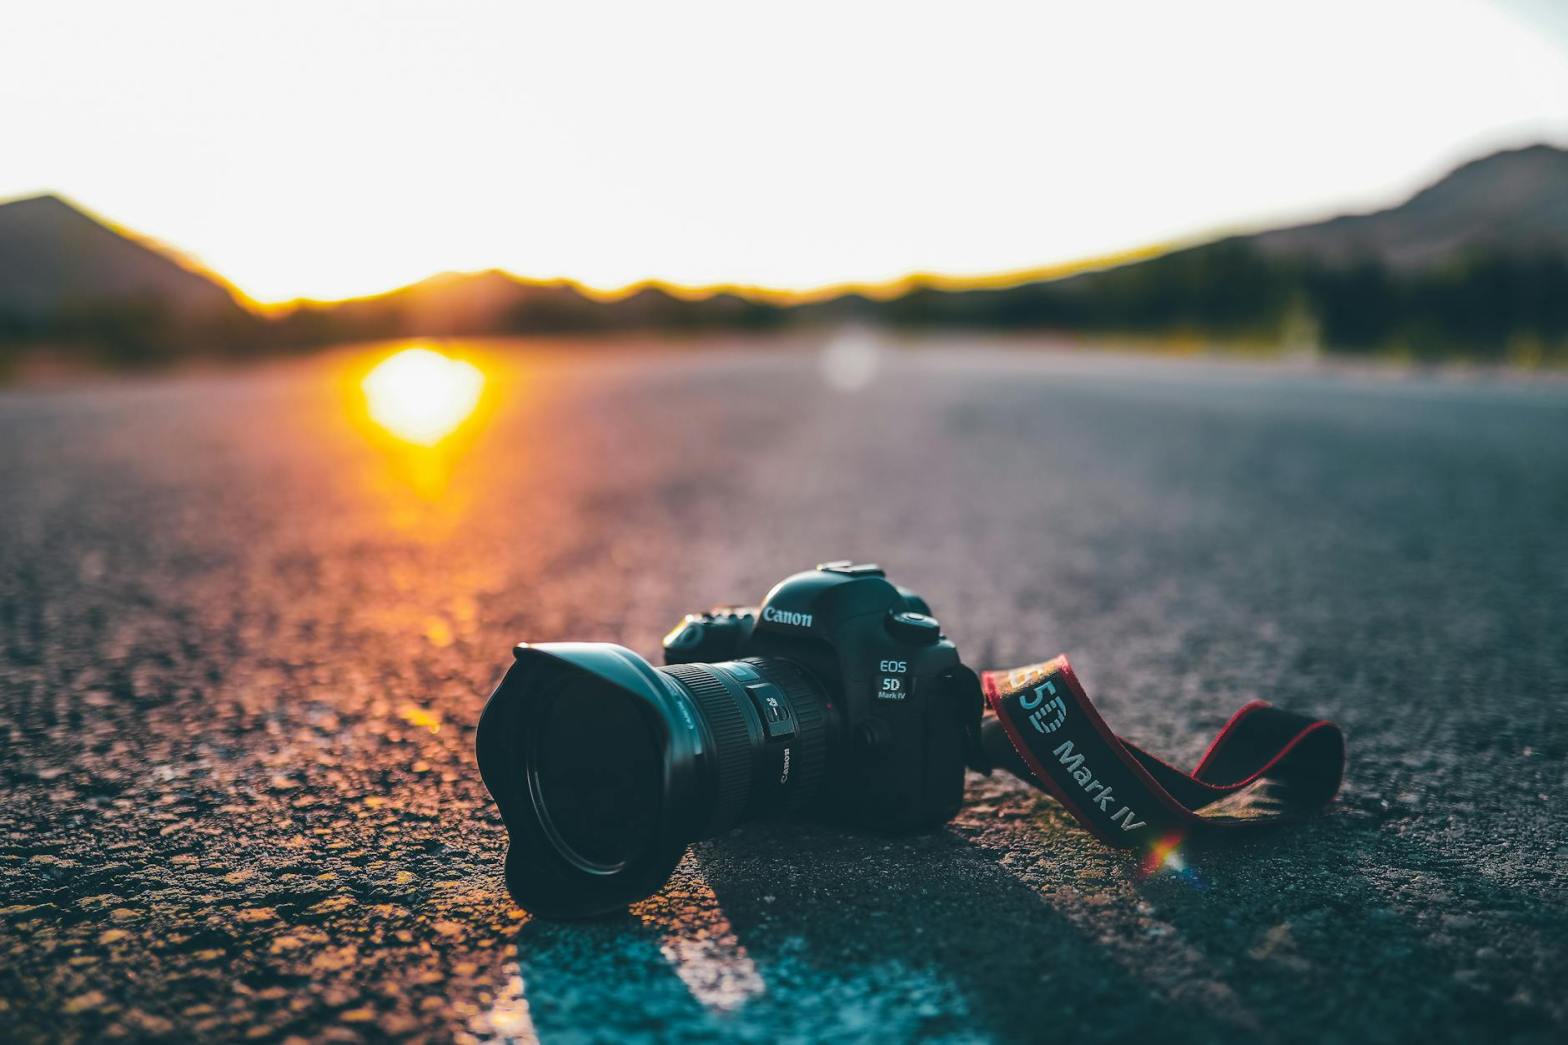
Mirrorless cameras have transformed the photography industry, offering a modern, lightweight alternative to traditional DSLRs. They eliminate the need for a mirror mechanism, which not only reduces their size and weight but also enables advanced digital features. This section delves into the advantages, technical specifications, and considerations when choosing a mirrorless camera, helping photographers of all levels understand why they might opt for this system.

Understanding the Mirrorless System

Unlike DSLRs, which rely on a mirror and optical viewfinder to preview images, mirrorless cameras use an electronic viewfinder (EVF) or an LCD screen to display a digital representation of the image. This allows photographers to see an accurate exposure preview, including real-time effects of settings like white balance, aperture, and shutter speed. This difference in viewing mechanism is at the heart of what makes mirrorless cameras distinct from DSLRs.

Key Features of Mirrorless Cameras

1. Compact and Lightweight Design

One of the biggest advantages of mirrorless cameras is their portability. Without a mirror box and optical prism, manufacturers can design smaller and lighter camera bodies while maintaining high image quality. This makes mirrorless cameras ideal for:

  • Travel photographers who need to carry their gear for long periods.
  • Street photographers who require discretion and quick access to their cameras.
  • Videographers who appreciate the reduced weight when mounting cameras on gimbals or stabilizers.

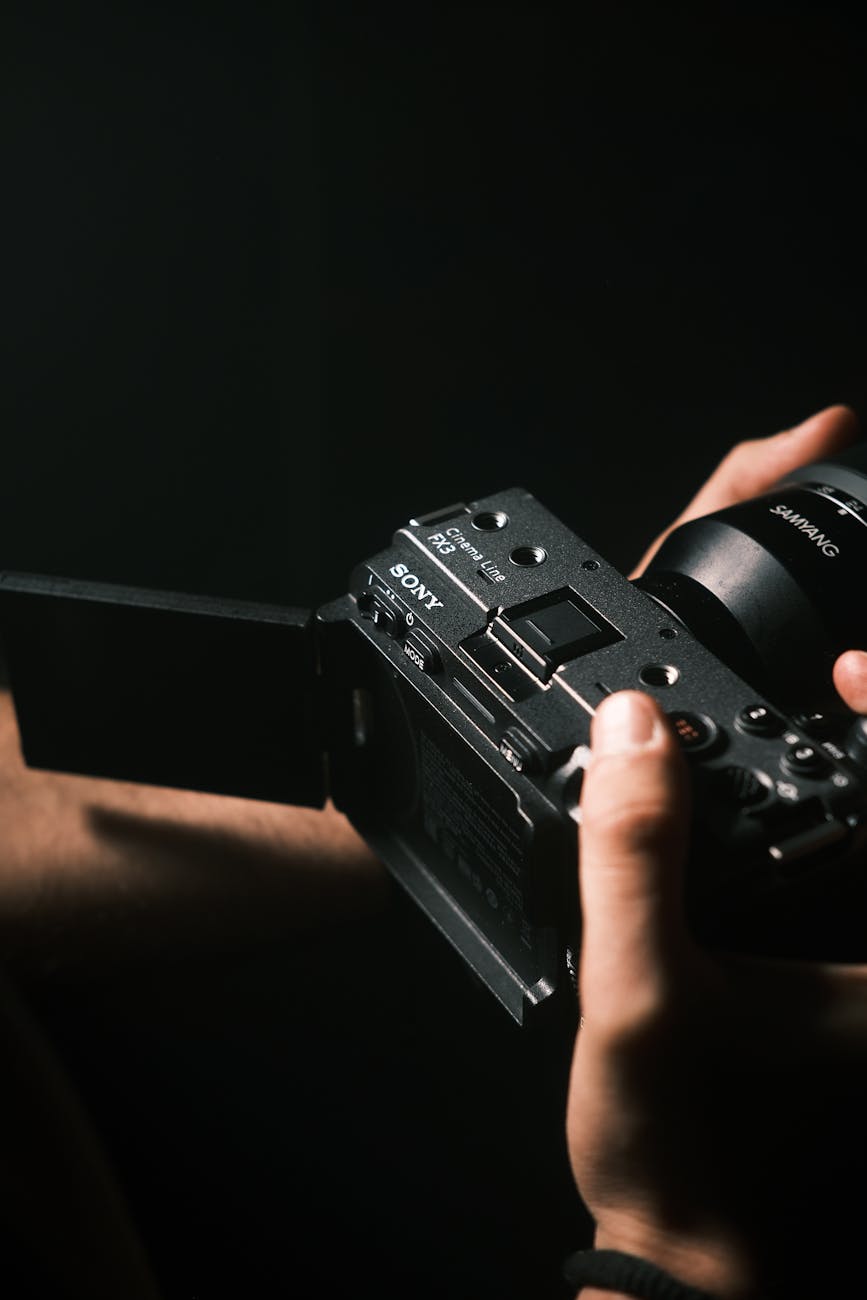
2. Electronic Viewfinder (EVF) and LCD Screen

Since mirrorless cameras lack an optical viewfinder, they rely on an electronic viewfinder (EVF) or LCD screen to compose shots. The benefits of an EVF include:

  • Real-Time Exposure Preview: See exactly how adjustments to ISO, shutter speed, and aperture will affect the final image before pressing the shutter.
  • Enhanced Visibility in Low Light: Unlike optical viewfinders that darken in low-light conditions, EVFs amplify available light, making it easier to frame shots in dim environments.
  • Focus Peaking and Zebra Stripes: Advanced features help with manual focusing and exposure control, ensuring precise results.

However, some photographers prefer the optical experience of a DSLR viewfinder, as EVFs can introduce a slight lag or drain battery life faster.

3. Interchangeable Lenses

Similar to DSLRs, mirrorless cameras support interchangeable lenses, offering versatility for different types of photography. Most major brands have developed extensive lens lineups, including:

  • Wide-Angle Lenses for landscape and architectural photography.
  • Prime Lenses for portraits with beautiful background blur.
  • Telephoto Lenses for wildlife and sports photography.
  • Macro Lenses for close-up details of small subjects.

Some mirrorless cameras also support lens adapters, allowing photographers to use their existing DSLR lenses, although this may add bulk and reduce autofocus performance.

4. Advanced Autofocus Systems

Mirrorless cameras have an edge over DSLRs in autofocus technology, particularly in continuous tracking and face/eye detection. They utilize:

  • Phase Detection and Contrast Detection: Many models combine these technologies for faster and more accurate focusing.
  • Eye Autofocus (Eye AF): Detects and locks onto a subject’s eyes, crucial for portrait and wildlife photography.
  • Superior Video Autofocus: Mirrorless cameras excel at subject tracking in video mode, making them popular among content creators and vloggers.

5. High-Quality Video Capabilities

Videographers favor mirrorless cameras for their advanced video features. Many offer:

  • 4K and Even 8K Recording: Crisp, high-resolution footage.
  • In-Body Image Stabilization (IBIS): Reduces camera shake for smooth handheld shots.
  • Log Profiles and RAW Video: Greater flexibility in post-production color grading.

These features make mirrorless cameras the go-to choice for independent filmmakers and YouTubers.

Considerations When Choosing a Mirrorless Camera

1. Battery Life

Since mirrorless cameras rely on digital screens and EVFs, they consume more power than DSLRs. Battery life varies by model, but here are ways to mitigate power concerns:

  • Carry spare batteries for extended shoots.
  • Use power-saving modes and turn off the LCD when not in use.
  • Invest in external battery grips for professional work.

2. Lens Selection and Compatibility

While mirrorless systems have expanded their native lens offerings, some brands still lag behind the extensive lens options available for DSLRs. However, companies like Sony, Canon, Nikon, and Fujifilm continue to release high-quality mirrorless lenses, and third-party manufacturers such as Sigma and Tamron have also entered the market.

3. Price and Investment

Mirrorless cameras range from budget-friendly entry-level models to high-end professional systems. When considering the switch to mirrorless, photographers should factor in:

  • The cost of additional lenses and accessories.
  • Potential need for new memory cards (such as CFexpress for high-speed shooting).
  • Whether their existing DSLR accessories, such as flashes and remote triggers, are compatible.

4. Durability and Weather Sealing

Professional-grade mirrorless cameras often include weather sealing to protect against dust and moisture. For outdoor and adventure photographers, models with magnesium-alloy bodies and robust sealing are recommended.

Who Should Choose a Mirrorless Camera?

Mirrorless cameras cater to a wide range of photographers, including:

  • Beginners: Compact models with intuitive controls make for an excellent first camera.
  • Enthusiasts: Those looking to upgrade from smartphones or compact cameras will enjoy the enhanced image quality and creative control.
  • Professionals: High-end mirrorless cameras now rival and even surpass DSLRs in performance, making them suitable for commercial and studio work.
  • Videographers: With superior autofocus, stabilization, and 4K/8K capabilities, mirrorless cameras are the preferred choice for filmmakers and vloggers.

The Future of Mirrorless Cameras

The industry is rapidly shifting toward mirrorless technology, with major brands prioritizing research and development in this area. Future advancements may include:

  • Better Battery Life: Improved efficiency and higher-capacity batteries.
  • More Affordable Options: As technology advances, entry-level mirrorless models will become more accessible.
  • Enhanced AI Autofocus: Even smarter subject tracking and recognition.

Conclusion

Mirrorless cameras offer a compelling alternative to DSLRs, blending portability with cutting-edge technology. Whether you’re a beginner looking for a lightweight travel companion or a professional seeking top-tier performance, the mirrorless system provides a versatile and future-proof solution. Understanding their features and limitations can help you make an informed decision, ensuring you invest in the right camera for your photographic journey.

DSLRs (Digital Single-Lens Reflex Cameras)

Understanding the DSLR Advantage

At the heart of a DSLR’s functionality is its mirror mechanism, which reflects light from the lens into an optical viewfinder. This means that what you see through the viewfinder is exactly what your lens captures, providing a true-to-life perspective crucial for precise composition.

Key Features That Enhance Learning

  1. Interchangeable Lenses One of the standout advantages of DSLRs is their ability to switch between a variety of lenses. Whether you’re capturing sweeping landscapes with a wide-angle lens, zooming in on distant subjects with a telephoto lens, or experimenting with macro photography, the flexibility is unmatched. This feature allows beginners to experiment and develop an understanding of focal lengths and composition techniques. Major brands like Canon, Nikon, and Sony offer extensive lens ecosystems, ensuring photographers have the right tools for every situation. Canon’s EF and RF lenses, Nikon’s F-mount and Z-mount lenses, and Sony’s A-mount lenses all provide a range of options for different types of photography.
  2. Superior Image Quality DSLRs are equipped with large sensors, typically APS-C or full-frame, which means they can capture high-resolution images with excellent detail, dynamic range, and low-light performance. The ability to shoot in RAW format allows for extensive post-processing, giving photographers full control over color grading and exposure adjustments. Some notable DSLR models include the Canon EOS 5D Mark IV, Nikon D850, and Pentax K-1 II, all of which are praised for their outstanding image quality and professional features.
  3. Manual Control for Skill Development Unlike point-and-shoot cameras or smartphones, DSLRs offer complete control over settings such as aperture, shutter speed, and ISO. Mastering these settings helps photographers understand exposure, motion blur, and depth of field—key fundamentals in digital photography. Beginners can start with semi-automatic modes like Aperture Priority (Av/A) and Shutter Priority (Tv/S) before transitioning to full manual mode. This gradual progression helps users gain confidence and refine their creative control over their images.
  4. Optical Viewfinder for Real-Time Composition The optical viewfinder (OVF) in DSLRs provides a real-time, lag-free view of the scene, unlike mirrorless cameras that rely on electronic viewfinders (EVFs). This makes DSLRs particularly advantageous in bright outdoor conditions where electronic screens might suffer from glare.
  5. Durability and Longevity Many DSLRs are built to withstand challenging environments. Weather-sealed bodies and rugged designs make them suitable for outdoor adventures, allowing learners to practice in diverse conditions without worrying about damage from dust or moisture. Brands like Canon and Nikon are known for their durable DSLR models, with cameras like the Nikon D6 and Canon EOS-1D X Mark III built to handle extreme professional use.

Pros and Cons of DSLRs

ProsCons
Superior image quality due to large sensorsBulky and heavier compared to mirrorless cameras
Interchangeable lenses offer versatilitySteeper learning curve for beginners
Manual control for better creative controlTypically more expensive than compact cameras
Optical viewfinder provides real-time previewAutofocus in live view mode is slower than mirrorless
Long battery life compared to mirrorless camerasLimited video capabilities in some models
Durable and weather-sealed models availableCan be intimidating due to numerous buttons and settings

Overcoming the Learning Curve

Despite their advantages, DSLRs come with certain challenges, particularly for beginners. Here’s how to navigate them:

  • Managing Size and Weight: Unlike compact mirrorless cameras or smartphones, DSLRs tend to be bulkier. Investing in a comfortable camera strap and a quality bag can make carrying them easier. Some photographers opt for crop-sensor (APS-C) DSLRs like the Canon EOS 90D or Nikon D7500 for a balance of portability and performance.
  • Understanding Controls and Features: The vast number of settings and buttons may seem daunting at first. A good approach is to start with semi-automatic modes before transitioning to full manual control. Online tutorials, photography books, and camera-specific user guides can also be valuable resources.
  • Post-Processing and Editing: To fully harness a DSLR’s capabilities, learning post-processing software such as Adobe Lightroom or Photoshop is beneficial. RAW files provide flexibility in exposure, color correction, and sharpness adjustments.

Comparing DSLRs to Mirrorless Cameras

In recent years, mirrorless cameras have gained popularity due to their compact design and advanced autofocus systems. However, DSLRs still hold an edge in certain areas:

  • Battery Life: DSLRs generally have longer battery life due to the optical viewfinder using less power compared to mirrorless electronic viewfinders.
  • Lens Compatibility: Many photographers already own a collection of DSLR lenses, and adapting them to mirrorless systems can be cumbersome.
  • Optical Viewfinder Advantage: Some photographers prefer the real-time, lag-free viewing experience of an optical viewfinder.

That said, brands like Sony, Canon, and Nikon have been advancing their mirrorless technology, with models such as the Sony A7 IV, Canon EOS R5, and Nikon Z9 leading the market.

Tips for Choosing Your First DSLR

When selecting a DSLR as a beginner, consider the following:

  1. Budget: Entry-level models like the Canon Rebel T8i or Nikon D5600 offer excellent features at an affordable price.
  2. Sensor Size: APS-C sensors provide a good balance between affordability and performance, while full-frame sensors offer the best image quality but at a higher cost.
  3. Lens Availability: Ensure that the brand you choose has a diverse range of lenses for future growth.
  4. Intended Use: Portrait, landscape, sports, and wildlife photography all have different lens and camera body requirements.

Conclusion

While the learning curve may be steep, mastering a DSLR is a rewarding journey that equips photographers with the tools to capture stunning images. With patience, practice, and an eagerness to explore, beginners can harness the full potential of a DSLR and take their photography skills to new heights.

Whether choosing a Canon, Nikon, Pentax, or Sony DSLR, the key to success lies in continuous learning, hands-on experimentation, and a passion for storytelling through images.

Storytelling Through Photos: Crafting a Visual Narrative

Photography is more than capturing a fleeting moment; it’s about telling a story, evoking emotion, and inviting viewers to connect with a narrative. Storytelling through photos is an art that combines technical expertise with creative vision, bridging the gap between the seen and the felt. This chapter explores how photographers can craft compelling visual narratives, share meaningful stories, and create images that linger in the minds of their audience.


Why Tell Stories Through Photos?

Storytelling in photography serves many purposes:

  1. Emotional Connection: It resonates with viewers, allowing them to feel the emotions behind the scenes.
  2. Narrative Depth: A story engages the viewer, taking them on a journey rather than presenting a single isolated image.
  3. Cultural Preservation: Photos can document traditions, places, and events, preserving them for future generations.
  4. Artistic Expression: A narrative approach to photography transforms technical skill into a deeper art form.

Whether it’s a single image or a cohesive series, storytelling photography invites viewers to look beyond the frame and into the heart of the subject.


Key Elements of Storytelling Photography

1. Subject

The subject is the protagonist of your story. It could be a person, an object, a landscape, or an event.

  • Relatable Subjects: A grandmother’s weathered hands or a child’s joyful expression can evoke universal emotions.
  • Unique Perspectives: Capturing a rarely seen culture or subculture draws curiosity and intrigue.

2. Context

Context is the setting or environment that provides background for the subject.

  • Include visual elements that hint at the time, place, or circumstances.
  • Context enriches the story, turning a simple portrait into a reflection of a life or moment.

3. Emotion

Emotion is the core of storytelling. A successful narrative stirs feelings in the viewer—joy, sadness, nostalgia, or awe.

  • Focus on authentic moments and gestures.
  • Use lighting, composition, and color to enhance emotional impact.

4. Sequence

In multi-photo stories, sequence plays a critical role. The arrangement of images should guide the viewer through the narrative.

  • Start with a strong opener to set the scene.
  • Build tension or complexity in the middle.
  • Conclude with a resolution or powerful final image.

5. Connection

A great photo story draws viewers into the frame. Whether by direct eye contact with the subject or an immersive composition, connection holds their attention and keeps them engaged.


Techniques for Crafting Photo Stories

1. Plan Your Narrative

Before you begin shooting, outline your story. Consider:

  • What message or emotion do you want to convey?
  • Who or what is the subject of your story?
  • Where will the story unfold?
  • What key moments or elements need to be captured?

2. Capture a Range of Shots

A well-rounded photo story often includes three types of shots:

  • Wide Shots: Establish the setting and provide context.
  • Medium Shots: Show interactions, relationships, or group dynamics.
  • Close-Up Shots: Focus on details, emotions, or key elements.

For example, in a story about a street vendor:

  • Wide shots capture the bustling marketplace.
  • Medium shots highlight the vendor interacting with customers.
  • Close-ups showcase hands exchanging money or the vibrant colors of produce.

3. Use Composition Strategically

Strong composition enhances storytelling by directing the viewer’s eye and emphasizing the narrative.

  • Leading Lines: Guide the viewer through the scene.
  • Rule of Thirds: Place key elements off-center for balance.
  • Layering: Add depth by including foreground, midground, and background elements.

4. Play with Lighting

Lighting sets the mood and atmosphere of your story.

  • Golden Hour: Soft, warm light creates a nostalgic or romantic mood.
  • High Contrast: Dramatic shadows and highlights enhance tension.
  • Low Light: Dim conditions convey intimacy or mystery.

5. Focus on Authenticity

Candid moments often tell the most genuine stories. Instead of directing your subjects, observe and capture their natural interactions and expressions.


Types of Stories to Tell Through Photos

1. Personal Stories

Document your own life or that of someone close to you. This could include:

  • Milestones: Birthdays, anniversaries, or graduations.
  • Daily Life: Simple moments like a family dinner or a morning routine.
  • Transformations: A personal journey, such as learning a new skill or recovering from a challenge.

2. Cultural Stories

Explore and share traditions, festivals, or community rituals.

  • Focus on the details that define the culture, such as clothing, food, or architecture.
  • Be respectful and seek permission when photographing private or sacred events.

3. Environmental Stories

Highlight the beauty and fragility of nature.

  • Document ecosystems, wildlife, or natural phenomena.
  • Use your images to raise awareness about environmental conservation.

4. Event Stories

Cover events such as weddings, protests, or concerts.

  • Arrive early to scout the venue and plan your shots.
  • Look for moments of emotion or interaction that capture the event’s essence.

5. Conceptual Stories

Create abstract or imaginative narratives.

  • Use props, costumes, or special effects to build a fictional world.
  • Experiment with symbolic imagery to convey themes like love, fear, or hope.

Examples of Iconic Photo Stories

1. “The Great Depression” by Dorothea Lange

Dorothea Lange’s images, including the famous “Migrant Mother,” documented the struggles of families during the Great Depression. Her storytelling combined raw emotion with striking composition, giving a voice to the voiceless.

2. “A Day in the Life” Series

Photojournalists often create “day in the life” stories, capturing 24 hours in the life of a person or place. This approach provides an intimate glimpse into routines, challenges, and triumphs.

3. Wildlife Stories by National Geographic

Photographers for National Geographic excel at weaving narratives about animals and their habitats. These stories not only showcase stunning visuals but also highlight conservation issues.


Presenting Your Photo Stories

1. Online Platforms

Share your stories on social media, blogs, or photography websites. Platforms like Instagram, Behance, or Medium allow you to combine visuals with written narratives.

2. Photo Books

Compile your images into a photo book, pairing each shot with captions or essays that enrich the story.

3. Exhibitions

Present your series in a gallery or public space. Use print sizes, layouts, and lighting to create an immersive experience.

4. Multimedia Projects

Combine still images with video, audio, or text to create multimedia stories. Tools like Adobe Premiere or Canva can help you craft engaging presentations.


Overcoming Challenges in Storytelling Photography

1. Finding a Story

Look for narratives in everyday life. Simple moments, like a child playing or a café bustling with patrons, can tell profound stories.

2. Gaining Access

For cultural or personal stories, building trust with your subjects is essential. Spend time getting to know them and explain your intentions.

3. Balancing Authenticity and Artistry

While editing can enhance a photo’s impact, avoid manipulating images to the point where they lose authenticity.


Tips for Success

  1. Start Small: Practice with short, simple stories before tackling complex narratives.
  2. Observe and Anticipate: Watch for interactions, gestures, or moments that unfold naturally.
  3. Be Patient: Great stories often require time to develop. Don’t rush the process.
  4. Seek Feedback: Share your work with mentors, peers, or online communities to gain insights and improve.

Conclusion

Storytelling through photos is a powerful way to connect with your audience, convey emotions, and preserve moments that matter. Whether you’re documenting a cultural event, exploring personal narratives, or crafting conceptual tales, the art of storytelling elevates your photography from a technical skill to a meaningful craft.

As you embark on your storytelling journey, remember that every photo has the potential to tell a story—if you’re willing to look closely, plan thoughtfully, and shoot with intention. With practice, patience, and creativity, your images can become windows into worlds, capturing the beauty and complexity of life in ways words cannot.

Themed Series: Focusing on a Specific Subject or Style

A themed photography series is a compelling way to channel your creativity and push the boundaries of your photographic skills. By committing to a particular subject, concept, or style, you gain the opportunity to refine your approach, tell a cohesive story, and present your work with a unifying vision. Whether you’re a beginner looking to explore new ideas or an experienced photographer seeking to deepen your expertise, themed series can be an enriching and transformative project.


What is a Themed Photography Series?

A themed series is a collection of photographs centered around a single concept, subject, or style. Unlike individual images that stand alone, a series creates a narrative or visual cohesion, offering viewers a deeper, more immersive experience. Examples include:

  • Subject-Based Themes: Nature, architecture, or portraits.
  • Conceptual Themes: Emotion, movement, or contrast.
  • Stylistic Themes: Black and white, macro, or minimalism.

The flexibility of a themed series allows you to align the project with your personal interests and photographic goals.


Why Create a Themed Series?

1. Focus and Direction

Themed projects provide a clear purpose and structure, helping you avoid creative stagnation. Instead of wandering aimlessly, you work with intention.

2. Skill Development

Focusing on a single theme enables you to refine specific techniques and experiment with variations on a subject or style.

3. Storytelling Opportunities

A series allows you to explore narratives and concepts in greater depth, capturing nuances that might be overlooked in standalone images.

4. Portfolio Enhancement

A cohesive series can be a powerful addition to your portfolio, showcasing your ability to execute a unified vision.

5. Personal Growth

Themed projects often challenge you to step out of your comfort zone, sparking growth as both a photographer and a creative thinker.


How to Start a Themed Series

1. Choose Your Theme

Selecting a theme is the first and most critical step. Consider the following approaches:

  • Personal Interests: What subjects or styles resonate with you?
  • Challenges: Is there a technique or genre you’ve been eager to explore?
  • Current Trends: What themes are popular or thought-provoking in contemporary photography?
  • Story Ideas: Can you tell a story through your images?

Some popular themes include:

  • Nature’s Seasons
  • Urban Decay
  • Everyday Objects
  • The Human Face
  • Light and Shadow

2. Define Your Scope

Determine the size and duration of your project. Will it be a short-term series of ten images, or a long-term endeavor spanning months? Consider your schedule and goals.

3. Research and Plan

Study other photographers who have created themed series. Analyze what makes their work successful and draw inspiration for your own approach. Planning can involve:

  • Sketching ideas or creating mood boards.
  • Identifying locations, models, or props.
  • Scheduling shoots to align with natural light or seasonal conditions.

4. Establish Consistency

For a series to feel cohesive, maintain consistency in:

  • Style: Stick to a specific color palette, editing technique, or visual mood.
  • Composition: Use recurring patterns, angles, or framing techniques.
  • Format: Decide if your series will use horizontal, vertical, or square crops.

Exploring Popular Themes

1. Nature and Landscape Themes

  • Changing Seasons: Capture the transformation of landscapes across spring, summer, autumn, and winter.
  • Natural Patterns: Highlight textures in leaves, bark, rocks, or water.
  • Wildlife Focus: Document a particular species or ecosystem.

2. Urban and Street Photography

  • Cityscapes at Night: Experiment with long exposures and city lights.
  • Graffiti and Street Art: Celebrate urban creativity.
  • Human Stories: Capture candid moments that reflect urban life.

3. People and Portraits

  • Cultural Portraits: Explore traditions and lifestyles in a specific community.
  • Emotional Expressions: Focus on capturing raw human emotions.
  • The Aging Process: Document the beauty of faces across different age groups.

4. Abstract and Conceptual Themes

  • Minimalism: Use clean lines and negative space to create striking compositions.
  • Color Studies: Focus on a single color or complementary color pairings.
  • Reflections: Explore how mirrors, water, or glass distort and transform reality.

Techniques for Capturing Themed Series

1. Experiment with Composition

Within your theme, vary your framing to add visual interest. For example:

  • Use close-ups and wide shots.
  • Play with symmetry and asymmetry.
  • Incorporate leading lines and patterns.

2. Master Lighting

Lighting can unify your series or add depth to your theme:

  • For dramatic themes, use strong shadows or chiaroscuro lighting.
  • For softer themes, opt for natural light or diffused artificial light.

3. Explore Perspectives

Challenge yourself to shoot from unconventional angles:

  • Shoot from above or below your subject.
  • Incorporate reflections or distortions.

4. Edit Thoughtfully

Post-processing is vital for thematic cohesion. Use consistent editing techniques, such as:

  • Applying the same filter or preset to all images.
  • Maintaining uniform contrast, saturation, and sharpness.
  • Emphasizing the theme with selective adjustments, such as desaturating all but one color.

Telling a Story Through a Themed Series

1. Identify the Narrative

Decide what story you want to tell and how your theme supports it. For example:

  • A series on urban decay could explore themes of time, neglect, and renewal.
  • A portrait series might chronicle the daily lives of people in a specific profession.

2. Sequence Your Images

Arrange your photos to create a logical flow or emotional arc. Options include:

  • Chronological Order: Follow a timeline of events or changes.
  • Thematic Grouping: Cluster images by sub-themes or visual similarities.
  • Contrast and Surprise: Juxtapose opposing elements for impact.

3. Add Context

Provide titles, captions, or brief explanations to deepen the viewer’s understanding of your series.


Showcasing Your Themed Series

1. Online Platforms

Use photography websites, social media, or personal blogs to share your series. Platforms like Instagram, Behance, or 500px are particularly effective.

2. Physical Displays

Print your series for exhibitions, gallery shows, or personal portfolios. High-quality prints emphasize the artistry of your work.

3. Photo Books

Compile your series into a photo book, pairing images with narratives or commentary.

4. Competitions and Submissions

Submit your series to photography contests, magazines, or online galleries. Many organizations seek thematic work for features and awards.


Overcoming Challenges in Themed Series

1. Maintaining Motivation

Sticking to a theme can feel restrictive over time. Keep your enthusiasm alive by:

  • Taking occasional breaks.
  • Collaborating with other photographers.
  • Revisiting your theme from new perspectives.

2. Avoiding Repetition

Prevent your series from feeling monotonous by:

  • Experimenting with different techniques or styles within your theme.
  • Incorporating diverse settings, subjects, or props.

3. Balancing Cohesion and Variety

Strive for a balance between consistency and creative diversity. While your series should feel unified, each image should stand out on its own.


Celebrating Your Achievement

Completing a themed series is an accomplishment worth celebrating. Take time to reflect on:

  • What you learned about photography and storytelling.
  • How your technical and creative skills evolved.
  • The new perspectives or connections you gained.

Share your success with your audience and consider your next project. Perhaps your themed series has sparked an idea for a related subject or style to explore further.


Conclusion

A themed photography series is both a challenge and an opportunity—a chance to delve deeply into a subject, refine your artistic vision, and create something truly meaningful. By focusing on a specific theme, you not only develop as a photographer but also invite your audience to see the world through your unique lens.

Whether you choose to document the beauty of everyday objects, explore the emotions behind human expressions, or capture the fleeting moments of nature, a themed series offers endless possibilities for creative growth and storytelling. So pick a theme, grab your camera, and embark on a journey that promises to enrich both your skills and your perspective.

The 365 Days Project: A Yearlong Journey in Photography

Embarking on a 365 Days Photography Project is a transformative experience for photographers of all skill levels. This ambitious project involves capturing and sharing one photo every day for an entire year. It’s not just a test of commitment but also a journey of creative growth, technical improvement, and self-expression. Whether you’re looking to refine your skills, explore new techniques, or develop a personal style, the 365 Days Project can be a powerful catalyst for growth.


Why Take on the 365 Days Project?

Before diving into the logistics of the project, it’s important to understand its benefits. A yearlong photography challenge offers:

  1. Skill Improvement: Repeated practice is the key to mastery. Daily photography forces you to experiment with settings, composition, and lighting, sharpening your technical skills.
  2. Creative Growth: With 365 opportunities to tell a story, you’ll find yourself thinking outside the box to capture something fresh and compelling each day.
  3. Consistency: Building a creative habit fosters discipline and makes photography a natural part of your routine.
  4. A Visual Diary: At the end of the year, you’ll have a stunning collection of images documenting your life and growth as a photographer.
  5. Community Engagement: Sharing your journey online can connect you with other photographers and enthusiasts who provide encouragement and feedback.

Setting Yourself Up for Success

Define Your Goals

Before starting the 365 Days Project, clarify what you hope to achieve. Do you want to improve your technical skills? Develop a specific style? Experiment with a new genre? Knowing your objectives will help guide your creative choices throughout the year.

Choose Your Platform

Decide where you’ll showcase your daily photos. Popular platforms include:

  • Instagram: Ideal for visual storytelling with hashtags to expand your reach.
  • Flickr or 500px: Great for connecting with other photography enthusiasts.
  • A Personal Blog: Provides more space to share stories behind your photos.
  • Dedicated Apps: Apps like “365 Photo” help track and organize your project.

Plan for Challenges

Life gets busy, and there will be days when finding time for photography feels impossible. To stay on track:

  • Pre-plan photos for especially busy days.
  • Carry your camera (or smartphone) everywhere.
  • Set realistic expectations for yourself. Some days may yield simpler photos, and that’s okay.

Creative Approaches to the 365 Days Project

To keep your project fresh and engaging, consider incorporating themes, techniques, or challenges. Here are some ideas to inspire you:

1. Weekly Themes

Assign a theme to each week to focus your creativity. Themes could include:

  • Nature: Flowers, landscapes, or weather phenomena.
  • Architecture: Buildings, patterns, and urban scenes.
  • Portraits: Experiment with self-portraits or candid shots of others.
  • Colors: Highlight a specific color or palette each week.

2. Daily Prompts

Follow a list of daily prompts for guidance. Prompts like “reflection,” “motion,” or “contrast” spark ideas and encourage experimentation. You can find pre-made lists online or create your own.

3. Storytelling Through Series

Develop mini-series within your project, such as:

  • A week of black-and-white images.
  • A focus on hands, feet, or other unique perspectives.
  • Capturing different moods (joy, melancholy, anticipation).

4. Experiment with Techniques

Use the project as an opportunity to practice different skills:

  • Long exposures for light trails or water effects.
  • Macro photography to explore intricate details.
  • Low-light photography to master challenging conditions.

Tips for Staying Motivated

Start Small

The thought of producing 365 photos can feel overwhelming. Break it down into manageable chunks by focusing on completing one week at a time.

Build a Routine

Incorporate photography into your daily schedule. Whether it’s a morning walk, a lunch break session, or evening reflections, consistency helps build the habit.

Embrace Imperfection

Not every photo will be a masterpiece, and that’s okay. The goal is progress, not perfection. Learn from your less successful shots and celebrate your victories.

Connect with a Community

Join a group of photographers participating in similar challenges. Sharing your work and seeing others’ projects can provide inspiration and accountability.

Reflect Regularly

Every month, take time to review your photos. Identify patterns, note improvements, and set new goals for the coming weeks.


Technical Considerations

Gear

You don’t need a professional camera to participate. Use whatever gear is accessible and comfortable for you, whether it’s a DSLR, mirrorless camera, or smartphone.

Post-Processing

Editing can elevate your photos and help maintain consistency in your project. Experiment with software like Lightroom, Snapseed, or VSCO to enhance colors, lighting, and composition.

File Organization

With 365 images, keeping files organized is crucial. Create a folder for your project and label images by date or theme. Cloud storage or an external hard drive ensures your work is safely backed up.


Learning Opportunities Along the Way

The 365 Days Project is a yearlong classroom where every photo offers a lesson. Here’s what you might discover:

Improving Composition

Daily practice sharpens your eye for framing, leading lines, and balance. Over time, these elements become second nature.

Mastering Light

Whether it’s the golden hour, harsh midday sun, or artificial lighting, you’ll gain a deeper understanding of how light shapes an image.

Discovering Your Style

As you experiment with subjects, techniques, and editing, a personal style often begins to emerge—a hallmark of a confident photographer.


Celebrating Your Progress

Share Milestones

Highlight key moments in your journey, such as the 100th photo or a particularly meaningful image. Sharing these milestones can inspire and motivate others.

Create a Year-End Showcase

At the end of the project, compile your favorite photos into a portfolio, slideshow, or photo book. Seeing your growth documented over the year is immensely rewarding.

Reflect on the Experience

Ask yourself:

  • What did you learn about photography?
  • How have you grown as a creative individual?
  • What challenges did you overcome, and how did they shape you?

Success Stories and Inspirations

Many photographers credit the 365 Days Project with launching their careers or reigniting their passion for the art form. Examples include:

  • Jordan Matter: His daily street portraits evolved into a bestselling book.
  • 365 Projects on Flickr: Countless photographers have shared stunning collections, proving the challenge’s creative potential.

Conclusion

The 365 Days Project is more than a photography challenge—it’s a transformative journey that pushes you to grow, adapt, and explore. By committing to this yearlong endeavor, you’ll develop technical skills, unlock your creativity, and document a unique slice of your life.

While the road may be demanding, the rewards of completing the 365 Days Project are unparalleled. So grab your camera, take that first photo, and embark on a journey that will forever change the way you see the world.

Networking and Sharing

Networking and sharing your work are fundamental aspects of growing as a photographer and expanding your reach in the industry. Photography, at its core, is about connection—whether it’s capturing moments, telling stories, or engaging with others who share your passion. In this chapter, we will explore the strategies and tools necessary to build a thriving photography network and effectively share your work.


Why Networking and Sharing Matter

Networking and sharing serve two primary purposes: creating opportunities and fostering inspiration. Building relationships within the photography community can lead to collaborations, mentorships, job opportunities, and creative growth. Sharing your work amplifies your visibility, builds your brand, and connects you with audiences who appreciate your unique style.

In an age where social media and online platforms dominate, networking and sharing have become more accessible than ever. However, strategic efforts are necessary to ensure your efforts resonate with the right audience.


Step 1: Build Your Photography Network

A strong network is the backbone of any successful photography career. Whether you’re an aspiring artist or a seasoned professional, the connections you make can provide valuable insights, resources, and opportunities.

Join Local Photography Groups

  • Local photography clubs and meetups offer an excellent chance to connect with fellow photographers in your area.
  • These groups often host events, workshops, and photo walks, where you can learn, share ideas, and collaborate.
  • Use platforms like Meetup.com or search for photography groups on Facebook to find local opportunities.

Participate in Online Communities

  • Online forums and social media groups cater to photographers of all levels. Engage with communities like:
    • Reddit’s r/photography
    • Facebook groups such as “Photographers’ Connection”
    • Specialized forums like Digital Photography Review (DPReview).
  • Share your work, ask for feedback, and contribute to discussions to establish yourself as an active and valued member.

Attend Industry Events

  • Photography expos, trade shows, and conferences are excellent venues for networking. Events like Photokina, WPPI (Wedding and Portrait Photographers International), and regional fairs allow you to meet professionals, view the latest gear, and attend workshops.
  • Introduce yourself to speakers, exhibitors, and fellow attendees to expand your network.

Collaborate with Other Creatives

  • Partnering with stylists, models, makeup artists, and other creatives opens doors to mutually beneficial projects.
  • Collaboration not only diversifies your portfolio but also introduces you to the networks of your collaborators.

Step 2: Share Your Work Strategically

Sharing your work is an art in itself. A thoughtful approach ensures your images reach the right audience and make a lasting impression.

Create a Consistent Brand

  • Your work should convey a clear and cohesive visual identity. Consistency in editing style, subject matter, and tone helps audiences recognize and connect with your brand.
  • Use a unified logo or watermark on your images to establish brand recognition.

Leverage Social Media

Social media platforms are invaluable for photographers, offering a direct channel to showcase your work and interact with followers.

  • Instagram: As a visually focused platform, Instagram is a natural fit for photographers. Share your best images, utilize hashtags like #landscapephotography or #portraitphotography, and engage with followers through comments and stories.
  • Pinterest: Create boards showcasing your work and link them to your website. Pinterest is especially effective for wedding, fashion, and travel photographers.
  • TikTok and YouTube: Share behind-the-scenes videos, editing tutorials, or creative projects to engage viewers.
  • Facebook and Twitter: Use these platforms to share links to blog posts, announce upcoming projects, and connect with niche communities.

Publish on Photography Platforms

  • Platforms like 500px, Behance, and Flickr cater specifically to photographers and designers, offering a space to showcase your portfolio to a dedicated audience.
  • Enter competitions hosted on these platforms for additional visibility and recognition.

Write and Share Blog Posts

  • If you have a website, a blog can be a powerful tool for sharing insights and engaging your audience. Share tips, behind-the-scenes stories, and reflections on your projects to provide added value to your readers.
  • Blogs also improve your website’s SEO, making it easier for people to discover your work online.

Step 3: Build Meaningful Relationships

Networking isn’t just about collecting business cards or followers; it’s about forming genuine, meaningful relationships.

Engage Authentically

  • Be genuine in your interactions with other photographers, clients, and followers. Authenticity fosters trust and strengthens connections.
  • Take the time to compliment others’ work or offer constructive feedback, showing that you value their contributions.

Follow Up

  • After meeting someone at an event or connecting online, send a thoughtful follow-up message. Mention what you appreciated about your conversation or interaction and express interest in staying in touch.

Offer Help Before Asking for It

  • Whenever possible, offer your assistance or expertise before asking for favors. Helping others builds goodwill and often leads to reciprocal support.

Step 4: Engage with Clients and Followers

Your clients and followers are the cornerstone of your photography business. Building strong relationships with them ensures loyalty and word-of-mouth referrals.

Interact on Social Media

  • Respond promptly and thoughtfully to comments and messages.
  • Ask your followers questions about their preferences or interests to encourage engagement.

Send Personalized Messages

  • After completing a project, send clients a thank-you message or email. Personal touches leave lasting impressions.
  • Include updates or special offers in newsletters to keep past clients engaged.

Showcase Testimonials

  • Positive feedback from satisfied clients builds credibility. Display testimonials on your website and social media.

Step 5: Use Analytics to Refine Your Approach

To ensure your networking and sharing efforts are effective, analyze the results of your strategies and adapt accordingly.

Track Social Media Performance

  • Use analytics tools like Instagram Insights, Facebook Analytics, or third-party platforms like Hootsuite to monitor the performance of your posts.
  • Identify which types of content resonate most with your audience and adjust your sharing strategy.

Monitor Website Traffic

  • Use tools like Google Analytics to track how visitors find and interact with your portfolio website.
  • Analyze which pages receive the most traffic and optimize them for better engagement.

Solicit Feedback

  • Ask your followers, peers, and clients for their opinions on your sharing and networking efforts. Constructive feedback can help you improve.

Step 6: Build Long-Term Connections

Sustainable success in photography depends on maintaining relationships over time. Focus on nurturing long-term connections rather than one-time interactions.

Stay in Touch

  • Regularly reach out to your network with updates on your projects, invitations to events, or simply to check in.
  • Use tools like LinkedIn to maintain professional connections.

Support Others

  • Share the work of fellow photographers or collaborators on your social media. Celebrating others’ achievements strengthens bonds within your network.

Attend Events Consistently

  • Make a habit of attending photography meetups, workshops, or online webinars. Regular participation helps you remain visible and engaged in the community.

Step 7: Expand Your Reach Globally

The internet provides photographers with unprecedented access to a global audience. To take full advantage of this, consider these strategies:

Translate Content

  • If your audience includes non-English speakers, offer translations of your blog posts or captions to reach a wider demographic.

Use International Hashtags

  • Incorporate hashtags that are popular globally, such as #travelphotography or #naturephotography.

Collaborate Across Borders

  • Partner with photographers or creatives from other countries on joint projects. Cross-cultural collaborations can open doors to new markets and audiences.

Conclusion

Networking and sharing are integral parts of building a successful photography career. By connecting with fellow photographers, engaging with your audience, and strategically showcasing your work, you can create meaningful opportunities and grow your brand. Remember, photography is as much about relationships as it is about images. Invest time and effort into forming genuine connections, and your network will become one of your most valuable assets.

In a field as dynamic as photography, the possibilities for collaboration and inspiration are endless. Embrace the power of networking and sharing, and watch your creative journey flourish.

Creating Online Portfolios

An online portfolio is one of the most powerful tools a photographer can use to showcase their work, attract potential clients, and establish a professional presence. In today’s digital-first world, having an accessible and visually stunning online portfolio is as essential as the images themselves. This guide will walk you through the process of creating an online photography portfolio that effectively highlights your talent and sets you apart.


Why Create an Online Portfolio?

Before diving into the details, it’s important to understand the benefits of having an online portfolio:

  1. Accessibility: Your work is available 24/7, making it easy for potential clients or collaborators to explore your portfolio.
  2. Professionalism: An online portfolio demonstrates that you take your craft seriously.
  3. Global Reach: You can showcase your work to a worldwide audience, expanding your opportunities.
  4. Customization: Online portfolios allow you to present your work in a way that aligns with your unique style and brand.

Step 1: Define Your Purpose and Audience

The first step in creating an online portfolio is to identify its purpose and intended audience. This will shape the design, content, and structure of your website.

Questions to Consider:

  • What is your goal? Are you looking to attract clients, apply for exhibitions, or simply share your work with a wider audience?
  • Who is your audience? Are they wedding clients, art buyers, or commercial businesses?
  • What message do you want to convey? Your portfolio should communicate your unique style and expertise.

Step 2: Choose the Right Platform

Selecting the right platform is critical to creating a professional online portfolio. Several platforms cater specifically to photographers, offering customizable templates and user-friendly interfaces.

Popular Platforms:

  1. Squarespace: Known for its sleek designs and ease of use, Squarespace is a popular choice for photographers. It offers built-in tools for blogging, e-commerce, and SEO.
  2. Adobe Portfolio: If you’re an Adobe Creative Cloud subscriber, this platform is included in your plan. It integrates seamlessly with Lightroom and Photoshop.
  3. Wix: Offers extensive customization options and an intuitive drag-and-drop interface.
  4. SmugMug: Designed specifically for photographers, it includes options for image hosting, selling prints, and client galleries.
  5. WordPress: For those seeking maximum flexibility, WordPress offers a vast array of themes and plugins.

Key Considerations:

  • Ease of Use: Choose a platform that matches your technical skills and comfort level.
  • Customization Options: Ensure the platform allows you to create a site that aligns with your personal brand.
  • Cost: Balance your budget with the features you need.
  • SEO Capabilities: A platform with good search engine optimization (SEO) tools will help your site rank higher in search results.

Step 3: Curate Your Best Work

Your portfolio is only as strong as the images you include. Carefully curate your work to ensure you present a cohesive and impactful collection.

Tips for Selection:

  1. Show Your Strengths: Highlight the areas where you excel, whether it’s portraiture, landscapes, or commercial photography.
  2. Be Selective: Limit your portfolio to your top 15–20 images to keep it concise and engaging.
  3. Maintain Consistency: Ensure your chosen images share a consistent style or tone to create a cohesive experience.
  4. Consider Your Audience: Tailor your selection to the type of clients or projects you want to attract.

Step 4: Organize Your Portfolio

A well-organized portfolio enhances user experience and ensures visitors can easily navigate your site.

Organizational Tips:

  • Create Categories: Divide your work into relevant categories, such as portraits, weddings, landscapes, or commercial projects.
  • Use a Homepage Gallery: Feature a selection of your best images on the homepage to immediately capture attention.
  • Include Project Pages: For larger projects, consider creating dedicated pages with additional context or images.
  • Prioritize User Experience: Keep navigation simple and intuitive, with clearly labeled menus and easy-to-find contact information.

Step 5: Design a Visually Appealing Site

Your online portfolio’s design should complement your work and make it shine. Simplicity and elegance are often the best approach.

Design Tips:

  1. Use a Clean Layout: Avoid clutter and let your images take center stage.
  2. Optimize for All Devices: Ensure your site is mobile-friendly, as many users will browse on their phones.
  3. Choose a Minimal Color Scheme: Stick to neutral colors like black, white, or gray to avoid clashing with your photos.
  4. Include White Space: Leave room around your images to enhance their impact.
  5. Use High-Quality Images: Upload your photos in high resolution to showcase their details.

Step 6: Write Compelling Content

While the images are the star of your portfolio, well-written content adds context and connects with your audience.

Essential Pages to Include:

  1. About Page: Share your background, artistic philosophy, and what inspires you. Include a professional photo of yourself to build trust.
  2. Portfolio Page(s): Display your curated images, organized into categories or themes.
  3. Services Page: If applicable, list the services you offer, such as portrait sessions, event coverage, or fine art prints.
  4. Contact Page: Provide a contact form, email address, and links to your social media profiles. Make it as easy as possible for visitors to reach you.
  5. Blog (Optional): A blog allows you to share behind-the-scenes insights, tips, or personal stories, helping to engage your audience further.

Step 7: Optimize Your Portfolio for SEO

Search engine optimization (SEO) ensures your portfolio is discoverable online. A well-optimized site can attract more visitors and potential clients.

SEO Tips:

  1. Use Relevant Keywords: Include keywords related to your niche, such as “wedding photographer in Los Angeles” or “fine art landscape photography.”
  2. Optimize Image Files: Use descriptive filenames and add alt text to your images.
  3. Write Meta Descriptions: Craft compelling meta descriptions for each page to improve click-through rates.
  4. Create a Blog: Regularly updated blogs with relevant content can boost your SEO rankings.
  5. Submit Your Site to Search Engines: Use tools like Google Search Console to ensure your site is indexed.

Step 8: Add Social Media Integration

Integrating your social media profiles with your portfolio allows visitors to connect with you on multiple platforms. It also enables you to share your portfolio easily.

Social Media Tips:

  • Include social media icons on your homepage and contact page.
  • Share links to your portfolio in your social media bios.
  • Regularly post updates about new projects or blog posts to drive traffic to your site.

Step 9: Test and Launch

Before going live, thoroughly test your site to ensure it works smoothly and looks professional.

Checklist for Testing:

  • Functionality: Test all links, buttons, and contact forms.
  • Responsiveness: Check how your site looks on different devices and screen sizes.
  • Speed: Optimize your site for fast loading times, as slow pages can deter visitors.
  • Proofreading: Review all text for spelling or grammatical errors.

Once you’re confident in your site, publish it and start sharing the link!


Step 10: Maintain and Update Your Portfolio

An online portfolio isn’t static. It should evolve as you grow as a photographer and take on new projects.

Maintenance Tips:

  • Regular Updates: Replace older images with new, stronger work.
  • Track Analytics: Use tools like Google Analytics to monitor traffic and visitor behavior.
  • Stay Current: Update your contact information and ensure all links are functional.

Conclusion

Creating an online photography portfolio is an essential step in building your brand and reaching a broader audience. By selecting the right platform, curating your best work, and designing a visually stunning site, you can showcase your talent in a way that captures attention and leaves a lasting impression.

An online portfolio is more than a collection of images—it’s your digital storefront and a reflection of your professionalism. Invest the time and effort to make it truly shine, and let it be a gateway to exciting opportunities in your photography journey.

Building a Portfolio – Selecting Your Best Work

In the journey of photography, building a compelling portfolio is a pivotal step. Your portfolio is more than just a collection of photos; it’s a showcase of your talent, creativity, and unique perspective. Whether you’re an aspiring professional or an enthusiastic hobbyist, curating and presenting your best work can open doors to new opportunities and establish your presence in the photography world.

This guide dives into the art and strategy of selecting your best work, ensuring your portfolio stands out and resonates with your intended audience.


Why Your Portfolio Matters

A portfolio serves as your visual resume. It communicates who you are as a photographer, your style, and your technical proficiency. Here’s why it’s crucial:

  • Professional Opportunities: A strong portfolio attracts potential clients, galleries, and collaborators.
  • Creative Identity: It helps define and reinforce your artistic voice.
  • Continuous Growth: The process of curating your work pushes you to evaluate and improve your skills.

1. Define Your Goals and Audience

Before selecting your best work, clarify the purpose of your portfolio. Ask yourself:

  • What is the goal? Are you seeking clients, applying for exhibitions, or showcasing your personal projects?
  • Who is your audience? Understanding whether your audience is art directors, potential clients, or fellow artists will influence the type of work you include.

For example:

  • Commercial Photography: Include technically perfect images showcasing versatility and storytelling.
  • Fine Art Photography: Focus on conceptual depth and aesthetic coherence.
  • Event Photography: Highlight your ability to capture emotions and candid moments.

2. Review Your Entire Collection

Start by gathering all your work. This step is crucial for identifying hidden gems and patterns that might not be immediately apparent.

Tips for Reviewing:

  • Be Objective: Try to detach yourself emotionally from the images. What matters is how they connect with the audience.
  • Seek Second Opinions: Trusted friends, mentors, or photography communities can provide valuable feedback.
  • Look for Consistency: Consistent quality, style, and tone are essential for a cohesive portfolio.

3. Establish Selection Criteria

To curate a standout portfolio, you need a clear set of criteria for choosing your best work. Consider the following:

A. Quality over Quantity

  • Limit your portfolio to your top 15–20 images. A concise, impactful selection is more impressive than an overwhelming array.
  • Each photo should represent your best work, with no filler images.

B. Technical Excellence

  • Ensure proper focus, exposure, composition, and editing. Even one technically flawed image can undermine your credibility.

C. Uniqueness and Creativity

  • Showcase what sets you apart. Include images that reflect your signature style or a unique perspective.

D. Relevance

  • Align your selection with your goals and audience. A portfolio for wedding clients should differ from one aimed at fashion editors.

E. Narrative and Flow

  • Your portfolio should tell a story or create an emotional journey. Consider the order and relationships between images.

4. Focus on Your Strengths

Your portfolio is not the place to experiment or display work outside your expertise. Highlight the areas where you excel and feel most confident. If you’re known for dramatic landscapes or emotive portraits, let those strengths dominate.


5. Embrace Cohesion

A cohesive portfolio demonstrates professionalism and a well-defined artistic vision. Cohesion can come from:

  • Style: Use consistent editing techniques and visual language.
  • Theme: Focus on a specific subject, concept, or genre.
  • Color Palette: Harmonize colors across your portfolio for a polished look.
  • Mood: Convey a unified emotional tone, whether it’s vibrant, moody, or minimalistic.

6. Show Versatility Within Limits

While cohesion is essential, showing some versatility can prove your adaptability. For example:

  • A portrait photographer might include studio, environmental, and candid shots.
  • A landscape photographer could showcase different terrains, weather conditions, or seasons.

Balance Tip: Avoid straying too far from your niche. Stay true to your brand while highlighting diversity within it.


7. Prioritize Storytelling

Great photography isn’t just about aesthetics; it’s about connection and narrative. Choose images that evoke emotions or tell a story.

Storytelling Tips:

  • Combine wide, medium, and close-up shots to create visual variety.
  • Sequence your images to guide viewers through a journey. Start with a strong opener and end with a memorable closer.

8. Keep It Updated

Photography is a continuous learning process, and your portfolio should reflect your growth. Regularly review and update it to keep it relevant.

How Often to Update:

  • Every six months for professionals.
  • After completing significant projects or achieving notable milestones.

Signs It’s Time for an Update:

  • You’ve improved significantly since creating your portfolio.
  • Your goals or style have shifted.

9. Showcase Your Personality

Your portfolio should feel personal and authentic. Include images that resonate with your creative identity and make a statement about your vision as a photographer.

Ways to Add Personality:

  • Include a brief artist statement or captions for selected works.
  • Integrate your creative process through behind-the-scenes shots or project descriptions.

10. Test and Refine

Once you’ve created a draft portfolio, test its impact. Share it with your intended audience or trusted peers and gather constructive feedback.

Questions to Ask for Feedback:

  • Does the portfolio feel cohesive?
  • Are the strongest images placed strategically?
  • Does the sequence hold attention and create interest?

Use the insights to refine and polish your selection further.


11. Technical Considerations for Presentation

How you present your portfolio is as important as the images themselves. A poorly presented portfolio can detract from your work.

Digital Portfolios:

  • Use platforms like Behance, Adobe Portfolio, or Squarespace for professional presentation.
  • Optimize images for web resolution without compromising quality.
  • Create categories or galleries for easy navigation.

Printed Portfolios:

  • Choose high-quality prints and materials.
  • Include a mix of sizes to create visual interest.
  • Consider a minimalist design to let your photos shine.

12. Common Mistakes to Avoid

A. Overloading the Portfolio: Including too many images can overwhelm viewers. Stick to your very best work.

B. Lack of Focus: Avoid mixing unrelated genres or styles that dilute your brand.

C. Neglecting Presentation: Even the best photos can lose impact if presented poorly.

D. Ignoring Feedback: Constructive criticism can help refine your portfolio. Don’t shy away from seeking opinions.


13. Inspiring Examples of Great Portfolios

Look to established photographers for inspiration. Analyze their portfolios to understand what makes them compelling.

What to Observe:

  • The balance between cohesion and variety.
  • The emotional and visual flow.
  • How their personality and style shine through.

Conclusion

Selecting your best work for a photography portfolio is both an art and a science. It requires a deep understanding of your goals, audience, and creative identity. By focusing on quality, cohesion, and storytelling, you can craft a portfolio that not only showcases your skills but also leaves a lasting impression.

Your portfolio is a dynamic, ever-evolving representation of your journey as a photographer. As you grow, so should your portfolio. Keep learning, experimenting, and refining, and let your best work tell the story of your passion and talent.

Advanced Techniques in Post-Processing: Elevating Your Photography

Post-processing has revolutionized photography by enabling creators to craft images that go beyond what is captured by the camera. While basic edits like exposure and white balance lay the groundwork, advanced techniques allow you to transform your photos into masterpieces. These techniques delve deeper into the artistic and technical aspects of editing, offering unmatched creative control.

In this guide, we’ll explore advanced post-processing techniques, detailing how they work, when to use them, and the tools you’ll need to elevate your photography.


1. Non-Destructive Editing

Non-destructive editing ensures that the original image remains intact, allowing you to make changes without permanently altering the file.

Key Methods:

  • Adjustment Layers: In software like Photoshop, use adjustment layers for edits like curves, color balance, or exposure. These layers can be toggled on and off or modified later.
  • RAW Editing: Always shoot in RAW format for maximum flexibility during editing. RAW files store uncompressed data, providing greater detail and dynamic range.
  • Layer Masks: Apply changes selectively to specific parts of the image by painting on masks with precision.

Why It Matters: Non-destructive editing is essential for maintaining image quality and flexibility, especially when working on large projects or making multiple revisions.


2. Retouching

Retouching involves correcting imperfections and enhancing details, making it a popular technique for portrait, fashion, and commercial photography.

Key Retouching Tools:

  • Healing Brush and Clone Stamp: Remove blemishes, dust spots, or unwanted objects with precision.
  • Frequency Separation: A method to separately edit texture and color in portraits for natural-looking skin retouching.
  • Dodge and Burn: Lighten (dodge) or darken (burn) specific areas to add dimension and emphasize features.

Pro Tips:

  • Use subtle adjustments to avoid an over-processed look.
  • Zoom in to work on fine details but frequently zoom out to ensure the edits look natural.

3. Advanced Color Grading

Color grading goes beyond basic adjustments like white balance or saturation. It involves manipulating the tones and colors of an image to evoke a specific mood or style.

Techniques:

  • Split Toning: Apply different colors to the highlights and shadows for a cinematic look.
  • Hue, Saturation, and Luminance (HSL) Adjustments: Precisely control the intensity and brightness of specific colors in the image.
  • Look-Up Tables (LUTs): Use LUTs to apply pre-defined color grading profiles that can transform the mood of your photo instantly.

When to Use:

  • To create a consistent look across a photo series.
  • To align the color palette with the intended emotion or narrative of the image.

4. High Dynamic Range (HDR) Processing

HDR processing combines multiple exposures of the same scene to create a single image with greater detail in both highlights and shadows.

Steps for HDR Processing:

  1. Capture Multiple Exposures: Use bracketing to take underexposed, properly exposed, and overexposed shots.
  2. Merge Exposures: Combine the images in editing software like Lightroom, Photoshop, or dedicated HDR tools like Photomatix.
  3. Fine-Tune the Result: Adjust contrast, tone mapping, and saturation to achieve a balanced and natural look.

Best Applications:

  • Landscape photography with high-contrast lighting.
  • Architectural photography where details in shadows and highlights are critical.

5. Compositing

Compositing involves merging multiple images to create a seamless final photograph. It’s a powerful technique for creative storytelling and surreal compositions.

Techniques and Tools:

  • Layer Masks: Blend different elements by masking parts of each layer.
  • Selections: Use tools like the Pen Tool or Select and Mask in Photoshop for precise cutouts.
  • Perspective Matching: Ensure consistent angles and lighting between the images to achieve realism.

Common Uses:

  • Adding dramatic skies to landscapes.
  • Creating surreal or conceptual images by combining unrelated elements.

6. Focus Stacking

Focus stacking is a technique used to increase the depth of field in a photograph by merging multiple images with different focus points.

Steps to Focus Stack:

  1. Capture Images: Take several shots, each focused on a different part of the subject.
  2. Align and Merge: Use software like Photoshop or Helicon Focus to stack and blend the images.
  3. Refine: Clean up any artifacts or inconsistencies in the final image.

Best Applications:

  • Macro photography to achieve sharpness across a small subject.
  • Landscape photography where foreground and background details are both critical.

7. Advanced Sharpening Techniques

Sharpening enhances the perceived detail and clarity of an image, but advanced sharpening techniques provide more control and better results.

Techniques:

  • Unsharp Mask: Apply targeted sharpening by increasing contrast along edges.
  • High-Pass Filter: Use this filter on a duplicate layer set to Overlay mode for precise sharpening.
  • Selective Sharpening: Sharpen specific areas, like the subject’s eyes in a portrait, while leaving smoother areas untouched.

Tips for Success:

  • Avoid over-sharpening, which can introduce halos or noise.
  • Always view sharpening adjustments at 100% zoom for accuracy.

8. Advanced Noise Reduction

While basic noise reduction removes visible grain, advanced techniques preserve image detail while eliminating noise.

Key Tools:

  • Luminance Noise Reduction: Smooth out grainy textures in grayscale areas.
  • Color Noise Reduction: Correct chromatic specks in uniform color regions.
  • Selective Noise Reduction: Apply noise reduction to specific areas, such as shadows, without affecting detailed regions.

Pro Tips:

  • Use noise reduction sparingly, balancing smoothness and detail retention.
  • Combine noise reduction with sharpening for optimal results.

9. Creative Use of Textures and Overlays

Adding textures or overlays can give your images a unique style or atmosphere.

Applications:

  • Textures: Add layers like grunge, fabric, or light leaks for artistic effects.
  • Overlays: Use bokeh, lens flares, or color gradients to enhance mood.

How to Apply:

  • Use blend modes like Overlay, Soft Light, or Multiply in Photoshop.
  • Adjust opacity to control the intensity of the effect.

10. Panorama Stitching

Panorama stitching combines multiple images taken in sequence to create a wide, high-resolution panoramic view.

Steps:

  1. Capture Overlapping Shots: Ensure at least 30% overlap between adjacent photos.
  2. Stitch Together: Use software like Lightroom or Photoshop to merge the images.
  3. Crop and Adjust: Refine the composition and remove distortions.

Ideal For:

  • Expansive landscapes.
  • Urban cityscapes or architectural interiors.

11. Advanced Black-and-White Conversion

Creating stunning black-and-white images requires more than desaturating a color photo.

Techniques:

  • Channel Mixing: Adjust the contribution of red, green, and blue channels for nuanced tonal control.
  • Dodge and Burn: Add depth and dimension by lightening highlights and deepening shadows.
  • Split Toning: Apply subtle color tints to highlights and shadows for a vintage or modern look.

Tips:

  • Focus on contrast and texture to maximize impact.
  • Experiment with film emulation presets for inspiration.

12. Automation and Presets

Save time and maintain consistency by automating repetitive tasks or using presets.

Automation Tools:

  • Actions in Photoshop: Record a series of edits and apply them to multiple images.
  • Batch Processing: Edit a group of photos simultaneously in Lightroom or similar software.

Presets:

  • Use downloadable or custom presets to quickly apply a specific look or style.
  • Modify presets to suit the unique qualities of your photo.

Essential Software for Advanced Editing

  1. Adobe Photoshop: Best for precision editing, retouching, and compositing.
  2. Adobe Lightroom: Ideal for workflow management and non-destructive RAW edits.
  3. Affinity Photo: A cost-effective alternative to Photoshop with robust features.
  4. Capture One: Tailored for professional photographers, with excellent color grading tools.
  5. ON1 Photo RAW: Combines RAW processing with creative editing tools.

Common Mistakes to Avoid

  1. Overprocessing: Subtlety is key. Overuse of effects or filters can make photos look unnatural.
  2. Inconsistency: Ensure edits align with the intended style or purpose of the image.
  3. Ignoring Output Requirements: Tailor your edits for the platform or medium, such as print versus web.

Conclusion

Advanced post-processing techniques offer limitless possibilities for enhancing and transforming your photographs. By mastering these skills, you can bring your creative vision to life, refine your images to professional standards, and create work that captivates and inspires.

Practice is essential to perfect these techniques. Start with small projects, experiment with different tools, and gradually build your expertise. With time and dedication, advanced post-processing will become an integral part of your photography workflow.

Mastering Basic Edits: The Foundation of Post-Processing in Digital Photography

Photography doesn’t end when you press the shutter button; post-processing is a vital step in creating compelling images. While advanced editing techniques like retouching and compositing are often associated with professional photographers, the art of basic edits is equally powerful. These foundational adjustments can correct imperfections, enhance the aesthetic quality, and bring out the best in your photographs.

This blog delves into the core concepts of basic photo editing, providing you with a practical guide to transforming your images without overwhelming complexity.


Why Basic Edits Matter

Basic edits form the backbone of any post-processing workflow. Whether you’re a beginner or an experienced photographer, mastering these essential techniques is crucial for several reasons:

  1. Refinement: Correct exposure, white balance, and other image properties.
  2. Enhancement: Bring out hidden details and elevate the overall appeal.
  3. Preparation: Optimize images for specific outputs, such as printing or sharing online.
  4. Foundation: Create a polished base for more advanced editing if needed.

Key Components of Basic Editing

1. Cropping and Straightening

One of the simplest yet most effective edits is cropping, which allows you to:

  • Improve Composition: Align your subject according to the rule of thirds or remove distracting elements.
  • Reframe the Scene: Emphasize key parts of the image or change its focus.
  • Straighten Horizons: Ensure landscapes or architectural lines are level.

How-To Tips:

  • Use a grid overlay in your editing software to guide alignment.
  • Avoid excessive cropping that reduces resolution or cuts out important elements.

2. Adjusting Exposure

Exposure refers to the brightness of an image. If your photo appears too dark or bright, exposure adjustments can restore balance.

Key Elements to Adjust:

  • Brightness: Overall lightness or darkness.
  • Highlights: Bright areas in the image; reduce to recover details in overexposed regions.
  • Shadows: Dark areas; lift to reveal details in underexposed parts.
  • Contrast: The difference between light and dark areas; enhancing contrast adds depth.

How-To Tips:

  • Avoid pushing brightness too far, as it can wash out colors or introduce noise.
  • Use histogram tools to identify and correct overexposed or underexposed areas.

3. Correcting White Balance

White balance ensures colors appear natural and true to life. Improper settings during shooting may result in photos with an unwanted color cast.

Key Tools for White Balance:

  • Temperature: Adjusts the warmth (yellow tones) or coolness (blue tones) of an image.
  • Tint: Balances green and magenta hues.
  • Eyedropper Tool: Select a neutral gray or white area in the photo for automatic correction.

How-To Tips:

  • Aim for a natural look unless a creative effect is desired.
  • Compare before-and-after adjustments to ensure color accuracy.

4. Sharpening

Sharpening enhances details by increasing the contrast along edges. It’s particularly useful for bringing out textures in landscapes, portraits, or architectural shots.

Key Parameters:

  • Amount: The intensity of sharpening applied.
  • Radius: Determines how wide the sharpening effect extends from edges.
  • Detail: Controls the level of fine detail enhancement.

How-To Tips:

  • Zoom in to 100% while sharpening to avoid overdoing it.
  • Apply selectively; avoid sharpening smooth areas like skin.

5. Noise Reduction

Digital noise appears as graininess or color specks, especially in photos taken at high ISO settings or in low light. Noise reduction smooths these imperfections.

Types of Noise:

  • Luminance Noise: Grainy texture in black-and-white tones.
  • Color Noise: Random specks of color in otherwise uniform areas.

How-To Tips:

  • Strike a balance between reducing noise and preserving details.
  • Use separate sliders for luminance and color noise for more control.

6. Color and Tone Adjustments

Color and tone adjustments are critical for making your photos visually appealing and true to your artistic intent.

Key Adjustments:

  • Saturation: Increases or decreases the intensity of all colors.
  • Vibrance: Enhances muted colors without oversaturating already vibrant tones.
  • Hue: Shifts the overall color balance, useful for creative effects.
  • Clarity: Boosts midtone contrast to make details pop.

How-To Tips:

  • Use vibrance instead of saturation for subtle, natural enhancements.
  • Monitor skin tones during color edits to maintain realism in portraits.

7. Vignetting

A vignette darkens or lightens the edges of a photo, drawing attention to the central subject. This is often used as a creative effect to enhance composition.

How-To Tips:

  • Use sparingly to avoid making the vignette obvious.
  • Adjust the midpoint and feathering to blend the effect seamlessly.

Step-by-Step Basic Editing Workflow

  1. Import the Photo: Load your image into your chosen editing software (e.g., Lightroom, Photoshop, or a free alternative like GIMP or Darktable).
  2. Crop and Straighten: Start by improving the composition and ensuring the horizon is level.
  3. Adjust Exposure and Contrast: Correct brightness, highlights, and shadows to balance the light in your image.
  4. Correct White Balance: Use temperature and tint sliders or an eyedropper tool to eliminate unwanted color casts.
  5. Enhance Details: Apply sharpening to make textures more prominent, and reduce noise if necessary.
  6. Refine Colors: Adjust vibrance, saturation, and hue to create a pleasing color palette.
  7. Apply Creative Effects: Add a vignette or other subtle effects to emphasize the subject or mood.
  8. Export the Image: Save your edited photo in the appropriate format (JPEG for sharing, TIFF for archival) and resolution.

Recommended Tools for Basic Edits

  1. Adobe Lightroom: User-friendly interface with powerful sliders for all basic adjustments.
  2. Snapseed (Mobile): Free app offering intuitive tools like Selective Adjust and Healing.
  3. Darktable: Open-source Lightroom alternative for RAW editing.
  4. Photoshop Express: Simplified version of Photoshop for quick edits.

Common Mistakes to Avoid

  1. Overediting: Excessive sharpening, saturation, or noise reduction can make photos look unnatural.
  2. Ignoring Composition: Skipping cropping and straightening can leave your image less impactful.
  3. Failing to Save Non-Destructively: Always save an unedited copy of your original file and work on duplicates or use non-destructive tools.

The Role of Basic Edits in Creative Expression

While basic edits are often considered technical, they are deeply tied to artistic expression. Subtle adjustments can change the mood of an image—brightening a scene for a cheerful tone or enhancing shadows for drama. Experiment with different settings to find what resonates with your style.


Conclusion

Basic edits may seem straightforward, but their impact on your photography is profound. Mastering these foundational techniques equips you with the skills to turn good photos into great ones, ensuring your work stands out. By understanding the tools and workflow outlined here, you can confidently edit your images to reflect your creative vision.

Post-processing is a journey, and every adjustment brings you closer to mastering the art of photography. So, open your editing software, dive into these basics, and watch your images come to life!